Valentines, valentines, valentines..... On Valentine's Day it is so nice to receive and give tender, beautiful heart-shaped valentines. And today, making valentines with your own hands is as easy as shelling pears, there is such an abundance of ideas and materials for realizing the idea that your eyes run wild.
So my child and I didn’t buy anything at the girls’ store, but decided to make a three-dimensional paper heart with our own hands. And on the reverse side you can easily write congratulatory lines. Below we will show you how to make such a voluminous heart.
And here it is written how to make decoupage using the technique.
To make a three-dimensional heart, we need the following materials:
- thick cardboard, maybe from some box
- red colored paper A4 size
- scissors
- glue stick
- simple pencil
- ruler
- artistic or design knife
- hot glue gun with glue stick
How to make a voluminous paper heart with your own hands - step by step with photos:
Print or copy the heart template.
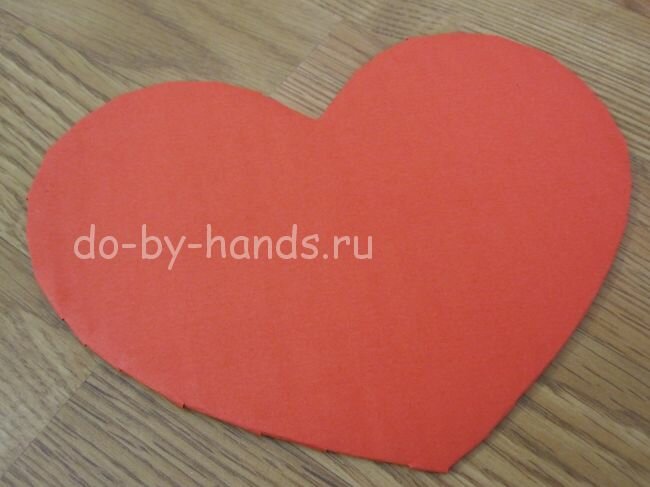
Cut out the template with scissors and draw it onto thick cardboard. 
Cut out the heart with scissors. 
Take a sheet of red paper, apply glue to the heart, evenly distributing it over the entire surface, coat the edges well. 
We cut it in the shape of a heart with scissors, departing 1.5-2 cm from the edge of the heart. We make cuts along the perimeter of the entire heart with scissors on red paper. 
Apply glue to the edge of the heart and, bending the red flats of the lower heart, glue them onto the glue along the entire edge. We get a spread like this. Moreover, the part that is not pasted over is our front side. 

Let's put our hearts aside and start making cones from colored paper. To do this, take a sheet of red paper, make markings 5 cm wide and cut into strips. 
Next, cut the strips of paper into squares with a side of 5x5 cm. 
Bend one end of the square towards the center. 
Lubricate the opposite end with glue and glue it onto the first part, which we folded into the center of the square. The result should be a cone. 
We need to make many, many cones like this. In my version, the heart consists of 65 cones. 
We plug the heat gun into the outlet and bring it to the desired temperature. Starting from the central part of the heart, squeeze a little glue onto the surface and begin gluing the cones, carefully distributing them according to the shape of the heart in order of elevation or decrease. 
This is what the first row of cones should look like. Even with cones, the heart should remain the same shape and look like a heart. 
In the same way we glue the second row of cones. 
All that remains is to fill the middle with cones and a voluminous paper heart - it’s ready. write your congratulations on the back with your own hands. And you can congratulate your loved ones. 
An ordinary piece of paper can be turned into a romantic bookmark in the shape of a red heart. To do this, you only need a few tools and one material - red double-sided paper. Now you will learn how to make a heart out of paper using the origami technique.
Origami heartNecessary materials:
- double-sided red paper;
- ruler;
- pencil;
- scissors.

Origami heart step by step instructions
- Using scissors, a pencil and a ruler, prepare required material, from which the heart will be created. To do this, draw dimensions 10 x 10 cm on a red sheet of paper (if you wish, you can take your own dimensions). Cut it out.

- From the resulting square we will fold a heart using the origami technique. All the tools can be put aside, because we won’t need them anymore. So, take a square and bend it in half.

- Let's reveal. The resulting fold creates a line.

- Now turn the sheet of square over a little and bend it in half again.

- Let's reveal. So we got two auxiliary lines that divide our square sheet into four parts.

- We bend the lower side towards the middle, namely towards horizontal line fold.

- Turn it over.

- We bend the upper corners to the vertical fold line, or rather to the middle.

- Turn the workpiece over to the other side again.

- We bend the sides towards the middle, namely towards the vertical fold line that runs through the entire square.

- We bend the bottom corners towards the middle.

- We combine the opposite corners of the workpiece.

- We hold the corners with one hand, and with the other we make folds at the bottom of the workpiece. Then we flatten the “pockets”.

- We unfold the part.

- We insert the lower corner into the resulting upper “pocket”.

- Fold in the small bottom corners.

- We bend the lower corners to the point where the vertices of the three triangles meet.

- Flip it over and you get a beautiful paper heart using the origami technique, which can be used as a bookmark.

The heart - a symbol of love - will decorate your home and become a great gift on Valentine's Day, the birthday of a loved one, will tell you about your sincere feelings. A voluminous heart can become a decorative item in a room, especially if it is made by hand.
admiring the beautiful options hearts, not everyone realizes that they can be made with their own hands without spending a lot of money. And a gift made with love keeps the warmth of the master’s soul and speaks of the sincere feelings of the giver.

Creative materials
Needlewomen will always find something to make a heart out of:
- from fabric;
- from burlap and lace;
- from newspaper tubes;
- from foam blanks and yarn;
- from paper.

And these are not all the options: let your imagination tell you how to make a gift for a loved one, and we will only suggest a variety of ideas and ways to make a heart for decoration.


Yarn heart
The easiest way is to make a three-dimensional heart from a cardboard or foam blank and thick yarn. If you don’t find a blank, cut out the base from thick cardboard (it’s best to take corrugated cardboard from an old box).

Lay padding polyester or cotton wool along the contour of the heart on both sides and carefully wrap the workpiece with threads. If you apply the thread turn to turn and take bulky yarn, the heart will be neat.

Don't forget to make a loop at the top so that the decor can be hung on the wall or attached to the ceiling. Additionally, you can decorate the craft with bouquets of artificial flowers, felt letters, and figurines.

Crafts made from threads and balls
A volumetric hollow heart from threads and balloons can be made in two ways:
Take balloon in the shape of a heart. Prepare threads (cotton Iris type is best), and PVA glue. Inflate the ball to the desired size, wrap it in cling film or grease the surface with vegetable oil.

Moisten the thread well with glue (you can pour the glue into a bowl and “bathe” the thread in it, or take a thick needle, insert the thread into it, pierce the bottle with glue through the needle: the thread, passing through the bottle, will be saturated with glue).

Wind the thread around the ball in different directions. Now leave the ball to dry, and when it is dry, pierce it and carefully pull it out through the holes of the openwork heart.


You can use ShDM - long thin sausage balls. Make a heart-shaped blank from two balls, in the same way as in the previous description, wrap the ball with threads, after treating it with oil so that the threads can then easily separate from the blank. All that remains is to pierce the ball - and the hollow openwork heart is ready.

What you get in the end can be seen in the photo of a homemade heart. Openwork figures can be used to decorate a wedding hall or a photo zone.

"Heart" topiary
You can make an original souvenir with your own hands to decorate a shelf in a room or a coffee table. You will need:
- small container (plastic glass, flower pot);
- durable wooden stick;
- gypsum;
- a foam blank in the shape of a small heart or 2 pieces of fabric measuring 12*12 cm;
- any decor for a heart.


We install the base of the future topiary in the container and fill it with plaster. Let it stand until it hardens completely. In the meantime, make a heart. It can be made by decorating a foam piece with coffee beans, threads, or by sewing a heart out of fabric and stuffing it with padding polyester or sawdust.

All that remains is to secure the heart with glue on a stick, wrap it with tape or satin ribbon, lace. Add decorative elements and the heart is ready.

In a room decorated in eco-style, you can decorate a topiary using burlap, sisal, and other natural materials.


Heart made of newspaper tubes
We offer another master class on how to make a heart from scrap materials - newspaper tubes.

You will need to wind a lot of newspaper tubes: this is best done on a medium-thick plastic knitting needle. Before weaving, dye them the desired color.

To create a three-dimensional heart, you will need to make a frame. First, he makes a flat contour blank by inserting wire into the tubes: this way you can give them the desired shape. Then you add transverse elements, arching them and giving the frame volume. When the base is ready, you need to braid it with the rest of the tubes, without using wire.

You can decorate the heart as you wish: with flowers, sisal, figures carved from wood or plywood.

When only paper is available...

... then you can come up with a lot of different options on how to make a voluminous heart with your own hands:
- using quilling technique;
- cutting out a lot of hearts from paper, then cutting and gluing the cut points - the heart will take a three-dimensional shape;
- by printing the blank and cutting it along the contour. Glue the flaps together and the heart-shaped box is ready.

A garland of hearts can be made from narrow strips of paper, and the origami technique allows you to make both a flat and three-dimensional figure.

How to make an origami “Heart”
- Divide the square sheet into 3 equal parts;
- Turn the lower right corner to point A on the left line;
- Wrap the right and bottom sides to point A;
- Turn the sheet so that the fold angle is at the bottom;
- Bend the top corner back;
- Make folds along the edges to make them rounded.

You can come up with other ideas for original voluminous hearts yourself, using your skills: hearts can be knitted, fabric products can be decorated with embroidery, lace, or decoupage can be done on a piece of plywood.


You will enjoy the very process of creating a gift with your own hands, and the person for whom it is intended will feel your love.

DIY photo of hearts


The heart symbolizes love and tender feelings. Decorating a room with hearts of different shapes and colors does not lose its relevance both on romantic evenings and holidays, and on ordinary days. A handmade heart is an excellent gift option for Valentine's Day, a relationship anniversary, or a birthday. It also looks good as a design element in a girl's room.
The presented product, in the form of three-dimensional hearts, attracts with its simplicity of the work process and affordable materials that do not require large financial investments. Despite this, it looks attractive and interesting. Can be used to make flowers corrugated paper, but based on the price category, ordinary napkins look no worse, but are several times cheaper.
Materials for production:
- cardboard;
- scissors or stationery knife;
- glue Moment transparent Crystal;
- stapler;
- pink table napkins;
- acrylic paints, brush;
- glitter;
- rope or ribbon for hanging.
Manufacturing process
1. Draw a heart on cardboard for the base. In this craft, a composition of three hearts will be made, one - 30 cm, two - 20 cm at the widest part.2. Cut out the hearts with scissors. A more convenient option is a stationery knife.

3. Paint the back of the hearts with paints. Here we use pink paint to match the color of the napkins. If pink is not available, it can be obtained by combining red and white.

4. Immediately, before the paint has dried, sprinkle it with glitter. They will stick directly to the paint without requiring additional adhesive. We decorate the back if the heart will be given as a valentine, or hung in the center of the room or on the windows. In the case where the heart is hung on the wall, it is possible to skip these steps and focus on the design of the front part.

5. Leave the hearts to dry completely.


6. The front of the hearts will be decorated with flowers. To make one flower you need two napkins.
7. Cut the napkins into single-layer squares.


8. Fold the resulting 8 squares like an accordion, one side measuring 1 cm.

9. Secure the accordion in the middle with a stapler. If it is not available, you can tie the accordion with thread. But this will require additional time and, possibly, the help of another person.
10. Trim the corners on both sides. You can, by cutting, make a sharp corner to obtain a flower, such as a dahlia or chrysanthemum. You can cut it in a semicircle, then the flower petals will be softer, like a rose.


11. Open the accordion. Gradually, carefully lift all layers towards the center.
12. Fluff the flower randomly to give it a finished shape.
13. Prepare the remaining flowers in a similar manner. For smaller hearts you will need, on average, 13-15 buds, and for a large one about 25 will fit.
14. Before attaching flowers, take care of the hanging hole. Make it using scissors or an awl, stretch a ribbon or string in advance for the loop.
15. Apply Moment glue to the entire surface of the heart.
16. Starting from the bottom, fill the entire area with flowers. Moment glue is good because it quickly secures parts; an important factor for its use is the first firm pressure.


