Manicure is not only a woman’s calling card - well-groomed hands talk about how a person feels about his appearance. Many girls visit beauty salons to ensure their nails always look brand new. But in fact, you can learn how to do manicure in different variations yourself at home if you use this material and a lot of training videos from it.
After watching the video tutorials, which show the step-by-step process of manicure, you will immediately understand how such nail care is done. With the help of rollers made from this material, you will learn from scratch how to properly care for the nail plate, how to properly coat it with varnish and how to design designs.
Lesson No. 1. Step-by-step application of varnish and drawing flowers with a needle
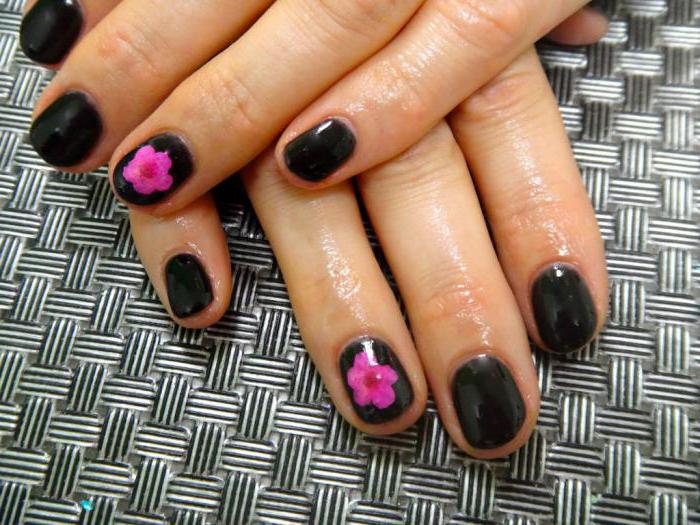
Femininity and spring can be present on your nails if you apply the appropriate prints using varnish. The following video will help you create a manicure on short nails for the cold season, even though it uses elements with flowers.
For the summer version, you just need to use other shades of varnish as a base. So, let's learn how to apply varnish step by step and draw decorative flowers using a needle or toothpick.
Lesson No. 2. Stamping
Simple, fast, elegant and chic. You didn’t even know how you could create a unique nail design at lightning speed without visiting a salon with exorbitant prices. Let's find out from the next video what it is stamping, how to do it correctly for beginners and put options for nail prints into a cheat sheet.
Note! Stamping can be done not only with gel or regular varnish. To create it You can also use acrylic paints, but many girls do not succeed in this option of creating prints on their nails, because acrylic paints are smeared on the surface of the nail. This situation can be easily corrected if you take information from the informative and educational video below.
As you can see, create a manicure acrylic paints It’s not at all difficult if you just know about some small but very important tricks. Stamping with acrylic paints, regular or gel polish looks beautiful on both short and long nails.
Lesson #3: Gradient
Gradient has recently attracted a lot of girls, as it looks simply amazing. A gentle and smooth transition from one shade of varnish to another creates a single duet on the nails, which takes on the main emphasis. With this pattern, you don’t even need any accessories for your hands, because the gradient can replace them on its own.
But not every lady realizes that doing a manicure this way is not at all difficult. How to create your own print on short nails using the gradient technique?
If you don’t know how to take care of your nails this way, then the following video will become your reliable assistant in creating a smoothly transitioning design.
Lesson No. 4. Trimmed manicure with gel polish
If you are not satisfied with the non-standard shape of your nails, you want to have a flawless and perfect manicure, or you just love the classics, then you need a trimmed manicure. It’s not at all difficult to do, the main thing is to be patient and careful, because during this process you can injure the skin near the cuticle or around the nails.
Perfect nails or all the beauty of a trim manicure - see how to create it using gel polish and learn about all the nuances of nail care in this case with the help of this video.
Please note that to decorate the trimmed version it is not necessary to use only gel polish - you can also resort to regular one.
Lesson No. 5. Unedged manicure
Unedged manicure is loved by those ladies who don't want to cut the cuticle so as not to provoke its growth. This procedure is a little safer than the trimming option, because it does not use any sharp objects in the form of scissors or swallows to remove the cuticle.
The following video describes the detailed step-by-step process of the untrimmed nail care lesson with all necessary materials and devices. After finishing your nails with an unedged manicure, you can use both regular and gel polishes. Rather, watch the video and get new ideas for inspiration.
Lesson No. 6. Step-by-step application of gel polish
Gel polish is unique for its durability, variety of shades, glossy shine and many other characteristics. And tell me, why go to a salon for beautiful and glossy nails with gel polish, if you can safely create beauty on them yourself at home?
Would you like to watch gel polish manicure lessons and know as many useful things as possible about this procedure? Then watch the following video, in which your attention will be offered:
- step-by-step process for creating beautiful nails using gel polish,
- what tools, special devices and materials you will need
- and many more useful little things in the form of tips and recommendations.
In the end I would like to give little advice! All videos from this material can also be used to create a pedicure. Yes, yes, imagine how beautiful it will look, for example, stamping simultaneously on the arms and legs with the same pattern.
Well, now you know what stepping, gradient are, how to design a print on short or long nails using regular or gel polish.
 Remember to create beautiful manicure how to do your own nails in a salon is not at all difficult, the main thing is to have a great desire to learn and remember those nuances with the recommendations that the masters give you from all the above videos.
We hope that we have inspired you to get creative and create new designs. Be beautiful, feminine and decorate this world with a brilliant manicure!
A perfect manicure is every girl's dream. The condition of hands and nails is an indicator of well-grooming. All fashionistas want to learn how to do a manicure on their own. This knowledge will save you not only money and time, but will also allow you to create a beautiful manicure at home, adding your own unique attributes to the design and realizing your own ideas.
Home manicure, subject to step-by-step technique, is in no way inferior to a salon procedure. The information from articles and video tutorials is quite enough to master the rules of manicure and practice the nail art you have planned.
Manicure basics include information about possible shapes of nail plates, methods of removing cuticles, and nail care features. Knowing the secrets of manicure, you can bring to life the most daring and original solutions. It doesn’t matter whether you do a manicure every day or just for a special occasion, manicure secrets and tricks from professionals will help you achieve a spectacular result. All about how to properly do a manicure at home.
Do you know step by step how to do beautiful nails at home. A proper manicure includes a number of mandatory steps. Home manicure or salon manicure does not play a special role. The only difference between them is the greater experience of the master and the availability of professional equipment.
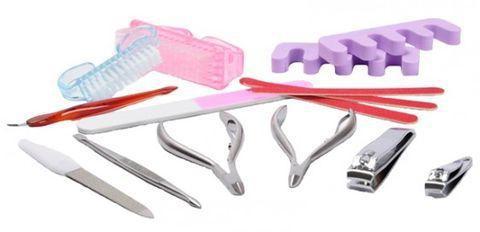
To create a beautiful manicure at home, you will need tools such as:
- manicure scissors;
- file;
- tweezers;
- a wooden stick or metal spatula to push back the cuticle.

Naturally, you can’t do without a decorative coating, or better yet, more than one. The richest assortment of varnishes can turn anyone’s head. Everyone wants to know how to do nails without using nail polish remover, because even the most experienced and careful girl can make a mistake and need correction. You also need a basecoat and a topcoat.
The technique of the procedure is presented in three options for removing the cuticle:
- Edged (tweezers).
- European (gel product).
- Hardware (using attachments).
Gel is the most popular way to make beautiful nails at home without cutting the cuticle. With its help, you can quickly and effectively soften the skin and, after the allotted time, simply remove it with the remnants of the product. You will get a neat, easy manicure without the risk of infection or damaging the painful area.

If you prefer the hardware method, you need not only to buy the device, but also to master it. But then you can very quickly process the nail plates, ridges, remove cuticles, etc. without burrs and injuries.
So, how to do a manicure, step-by-step technique:
- First of all, you need to remove the remnants of the previous nail art: wipe off the polish, remove stickers, etc.
- Next, make a hand bath to steam your skin. The water should be warm, close to hot, but at a comfortable temperature. Add a few tablespoons of herbal and essential oils, this will help soften the cuticle.
- The next step is to remove the cuticle using any method you choose.
- Afterwards, you need to move on to the shape of the nails.
What to consider when choosing a nail shape?
The answer to the question of how to make a beautiful manicure at home is impossible without a story about choosing the shape of your nails. The shape of the nail plates is one of the mandatory steps in the process of creating the right manicure. It depends not only on individual characteristics person, personal preferences and fashion trends play a significant role. Depending on the season, one form or another becomes trendy. Do you know what forms there are?
The following types are distinguished:
- Pointed.
- Almond-shaped.
- Oval.
- Rounded.
- Square.

The basics of manicure say that the choice of shape is influenced by how you feel. It is the pointed shape that is preferred by self-confident women who are quite powerful and characterful. The correct manicure for such people is a geometric design that emphasizes the shape of the nail plates.

The almond shape is typical for flirty young ladies. She was popular throughout recent years. The secrets of an almond-shaped manicure are that absolutely any design looks advantageous on such plates, creating a real testing ground for imagination and creativity: from the simple to the most interesting.

The oval shape is typical for conservative girls. How to get the perfect manicure is not a problem for them. They stand firmly on their feet and rarely make changes. Harmony and naturalness are their main principles, including in the matter of nail art.
They will repeat their favorite design over and over again until something new catches their eye.

The rounded shape of nails is considered the most versatile and traditional. Girls who give preference to her are considered to be romantic in nature. This shape adds charm and femininity. How to make your nails rounded? You just need to use a nail file to round the corners at the ends, and leave the top straight and even. The rounded shape is something between the oval and square variations.
Doing a manicure at home with this form is as easy as shelling pears, because even a simple clear coat will look great on them. You can choose a solid color design or a gradient, a complex pattern or a cool pattern. The rounded shape is also good for new fashion trends, so with it you can create even the most original manicure at home.

As for the square shape, it is considered the most popular recently. It goes great with your nails different lengths and width. This form is especially close to lovers of French manicure. This design is very simple, so a beautiful DIY manicure is quite doable, even if you have little skill. French is an excellent manicure for beginners, allowing you to get stylish nails with a minimum of skills.

Keep in mind that when shaping your nails, you need to use the file in one direction, this will protect them from peeling. Agree, why then painfully treat nails if you can prevent this unpleasant phenomenon. Moving the file in both directions is one of the most common mistakes that girls encounter when carrying out the procedure on their own.
Correct coverage
After giving the shape, it’s time to cover. There are a lot of subtleties in this process. You need to go over it again with nail polish remover to degrease the surface immediately before applying a new coat. The next step is the base layer. As a rule, such varnish not only prevents yellowing of the nail plates, but also evens them out, preparing them for further actions.
Now spread the selected decorative varnish over the nail. You can learn how to do a manicure so that the polish lays perfectly evenly by mastering the technique of applying a decorative coating:
- Place the brush at the base of the nail in the center and move it towards the edge.
- Returning to the starting point, move the brush to the side in arc movements, covering the space of the nail on the left side.
- Repeat the manipulation on the right side of the nail plate.
This must be done quickly, before the varnish has time to set, then you will get an even layer, without roughness. Don't forget that you will need to apply a sealer on top. It will help keep you presentable appearance created nail art for a longer period, and will also provide it with an attractive shine.

Now you know everything about how to get a beautiful manicure without leaving home. Your nails will always be well-groomed and elegant if you follow the suggested recommendations.
Girls like to surprise and change, so every season new items appear in the world of fashion and beauty. Manicure is a niche that is given Special attention, because now there are a lot of options for its execution for every taste. If you can’t go to a nail technician, you can do it simple for beginners.
It is worth noting that medium and short length nails are now in fashion; they are easier to care for and use. various options design, so even those who have never encountered the need to do this and have not specifically grown long claws will find it interesting to spend time in this way.
Let's start with preparation
Before doing a manicure, you need to carefully prepare the nail plate and cuticle. Both preparation and manicure do not require additional costs and are very simple to do, you just need to “fill” your hand a little. To carry out the procedure, the following tools are needed:
- trimmer or tweezers;
- file;
- scissors;
- cream, oil with vitamins, hand scrub;
- degreaser, if it is not in your home kit, you can use alcohol.
- trimmed (wet);
- hardware;
- unedged (European);
- SPA manicure.
The most common is the usual one, which is carried out using scissors or tweezers. It is used both in beauty salons and at home. For a cool one like in Europe, you need to take time to prepare before coating.
Step-by-step manicure lessons for beginners
So, after all the tools have been collected, you can get to work. Preparing your nails step by step:
- The beginning of the manicure consists of removing the old polish, after which the fingertips are soaked in a bath of warm water. Add pureed soap to the water, as well as sea salt and iodine to strengthen the nail plate if desired. Salons have a special product to quickly soften and remove the cuticle, but it is not necessary to use it.
- After 5 minutes, you can check whether the regrown skin is deformed well enough. Each finger is removed from the bath separately. To do this, you should use a pusher. The side that is shaped like a shoulder blade is used to thoroughly clean and remove the skin in the area of the hole.
- Next you should trim the cuticle. Either or tweezers are used. Those who have sufficient experience can use a trimmer.
- You need to hold the tweezers or scissors at an angle of 45 degrees; cut the cuticle in one line without interrupting it. Also, do not forget about the side bolsters, where the skin quickly becomes rough.
- After pruning, it is necessary to lubricate the area with oil to avoid irritation and dryness.
- After this, the nail plate needs to be filed down a little using a buff. This way, all irregularities are removed, and the adhesion to the varnish will be much better. Using files, the nail is filed to the desired length; it can be given a wide variety of shapes.
- Afterwards, the remaining oil is removed and the nail plate is degreased.
This is how easy it is to do a manicure at home for beginners. Speed can only be developed over time, so you will need to work hard on your first manicure.
We use regular varnishes
Those who like to look at their well-groomed fingers have realized that going to a specialist to apply gel polish is not at all necessary, because all these varnishes and drying lamps are sold in specialized stores, and you can choose inexpensive options. But for those who decide to get their nails in order for the first time, you can use regular varnish. It's better to start by doing short nails, which are easier to care for.

Before you do short manicure, you need to cover your nails with a colorless base varnish; you can use coatings for this purpose that give the nails strength and hardness. Regular varnish You can not just cover your nails in one color, but also do a gradient, water manicure and use different designs.
For those who want a simple option, just go with one tone. In this case, colored varnish is applied on top of the colorless varnish. Liquid and faded varnishes can be applied in two layers and wait until dry. After this, a top layer of colorless coating is applied to consolidate the result and give the nails the necessary shine. With these simple tips, manicure lessons for beginners become a breeze.
Also remember that the varnish must be applied correctly. A small amount should be used. The brush is placed approximately in the center of the nail plate, a couple of strokes are made in the middle part of the nail, then one on the sides and a few more throughout the nail to smooth out uneven color.
The simplest designs
Even the simplest manicure can be varied without an application special effort. Without making any drawings, you can achieve the effect of a summer mood if you paint your nails in different colors with similar shades. Manicure at home for beginners can also be done using dots or lines on the nails. Dots are placed with a regular needle, lines are made with a brush, there are also special ribbons on sale that are glued to nail plate.
Craftswomen use tape to paint their fingers in different colors. The desired shape is cut out on the tape, the nail is painted in one tone, then the tape is glued to the desired position and the second layer is painted.
French manicure
French is widely popular all over the world, and it is quite simple to make. French manicure step by step for beginners should be done like this:
- For the background you can use soft pastel colors: pink, coffee, beige. The nail is completely covered with the background color, then wait for it to dry.
- For the first time, you can buy special stencils, but then it is better to buy white varnish with a thin brush and learn to draw a “smile” yourself, as all masters do.
- After the background and smile are dry, you need to apply a clear varnish on top.
And to top it off
Doing manicures at home for beginners is not at all difficult, you just need to practice a little to work quickly and not be afraid to try something new to create unique designs. Many famous masters did not study anywhere; they themselves learned the art of caring for nails and giving them beauty.
In this section of the site we have posted 20 lessons for free learning of manicure technology , pedicure and nail extensions. The lessons are highly professional, their volume fully corresponds to the paid course of a full-time manicure school. After studying these lessons, you will not only learn how to do a manicure at home, but you can also work in a beauty salon as a manicurist.
The only difference between our lessons and face-to-face courses is that all the “water” such as economics, the history of manicure, etc., has been thrown out of them, but why do you need it?
If free text manicure lessons are not enough for you, or you need a certificate of completion from a manicure, pedicure and nail extension school, at the end of the article there is a link to paid, inexpensive, but highly effective video courses, also with free introductory lessons, so study for your health.
In this lesson you will study the structure of the hand, the lesson is simple, but you will have to learn it with all its terms by heart, otherwise there will be many incomprehensible terms, and you will return to this lesson more than once.
You also cannot do without knowledge of the normal state of the nail, the patterns of functioning and regulation of biological processes in the nail and possible painful or pathological changes in the nail plate. This lesson, like the previous foundation of knowledge, is for a specialist who wants to become a successful and sought-after master.
Do you know the difference between the nail root and the matrix, and why nail growth slows down and nail diseases occur? No, then this is the place for you.
The topic of nail disease is one of the most important in the work of a manicurist and pedicurist. Before you start doing manicure, pedicure, or nail extensions, you should first of all pay attention to the health of your hands, feet, nails your client. Otherwise, your mistake may cost you your career and the patient’s health; this happens very often.
Any work with the patient’s nails and hands begins with sterilization and disinfection of the working instrument. In this lesson you will learn all the methods of disinfecting instruments and working with devices to perform it.
Lesson #6. Tools and materials for manicure and pedicure.
Do you know what professional tools, differ from the tools from manicure sets. How are skin tweezers different from nail clippers? And why the tool from the advertised beautiful and expensive manicure sets is not suitable for your work. No, then.
Lesson #7.
In this lesson you will also learn what nail lines and nail stuffing are, what hand maceration is, how to properly massage your hands and how hand massage affects the client’s attitude towards you.
Lesson #8.
Do you know that European manicure the safest, since instead of tweezers we will use special cuticle removers. It is cuticle removers that dissolve dead skin around the nail plate and take care of the cuticle.
Lesson #9.
Hot oil manicure This is generally the height of perfection in cosmetology; when it is performed, moisturizing and therapeutic restoration of hand skin under the influence of special creams or lotions.
Because of its importance, this lesson is divided into two parts. In the second part you will learn how to prepare your own according to our signature recipe.
Lesson #10.
In this lesson you will learn all the procedures that have a unique restorative and rejuvenating effect for the hands and the woman’s body as a whole. The lesson is also divided into parts as an appendix to the lesson comes for hands.
The nail is broken. Who among us has not encountered such an annoying nuisance? You will learn the complete technology for repairing a broken nail with silk and fiber glass, not only for the client, but also for yourself.
During this lesson you will learn special care for your toes, which includes not only cosmetic nail care, but also some not quite manicure operations, such as the removal of calluses, corns, ingrown nails, disinfection and treatment of cracks.
Lesson #13.
Probably the most desirable thing in the process of learning nail service is nail extensions. Usually, students take a long time to come to him, and are allowed to practice only after passing all previous courses with excellent marks. You have a unique opportunity to start self-training with nail extensions.
You will learn:
— acrylic nail extensions
— gel nail extension
And two subtypes of extension:
- extensions on forms
- extensions using tips
This lesson is introductory. Has the addition “ ”.
Lesson #14. .
![]() Next free lesson, where you will learn the technology of performing helium nail extensions using a three-phase system. This extension technology can be successfully used both independently at home and in a beauty salon.
Next free lesson, where you will learn the technology of performing helium nail extensions using a three-phase system. This extension technology can be successfully used both independently at home and in a beauty salon.
Lesson #15.
Nail designs for beginners – Butterfly.
Nail designs for beginners – Lace.
Nail designs for beginners - Ladybug.
In just six simple steps You can draw these simple drawings on the nails.
Lesson #16.
In this lesson, we will make a stylish, modest and, by the way, very effective coating in the style French manicure or “French”, taking into account the fashion trends of 2015.
Lesson #17.
The easiest way to do nail art decor These are drip designs, that is, designs made by mixing several colors of varnish (usually 2 or 3) using a dots needle.
Lesson #18.
It's practically final stage of training specialists, even in full-time courses, masters give little knowledge on it and not surprisingly, it is this part that brings the main income to a nail business master, and few people give out their secrets.

Fernand Leger - the art of manicure
Japanese manicure is a modern technology for restoring damaged nails. after repeated extensions. The topic is generally under development, you can be the first. Study for your health.
Lesson #20. How to decorate your nails with stickers.
A very simple lesson and, nevertheless, useful for those who like to do everything with their own hands through trial and error. You will learn what photo design is. What is the difference between water-based and adhesive design stickers. And at the end with the help of the stickers you like.
And finally, as promised, a free introductory nail design lesson to it.
So as not to ignore the basics of any good manicure, we decided to show how easy it is to do a manicure at home step by step.
You've already gone broke cosmetic procedures in a high class salon? Give yourself a beautiful manicure. Knowing how to take care of your nails yourself can not only save you from spending money, but also make you a beauty expert. Doing your own manicure is easy and doesn’t take much time, you just need to learn how. You can do your manicure at home every week. In our textbook For beginners, all procedures will be shown in detail step by step. You can also watch a video at the end, which will be even more informative. If you want, you can watch it and find out all the information directly from there.
No matter how expensive the nail polish you buy, unless and until you take care of your nails, they will not be luxurious and attractive.
Follow these steps to learn how to do a beautiful manicure at home.
Step 1: Tools
To do your own manicure at home, make sure you have everything you need necessary tools. You may have to do some shopping to complete the entire set. Once you have a complete set of tools, you won't have to worry about this in the future the next time you do your nails at home.

Here's what you'll need:
- Nail polish buff
- Nail trimmer
- Cuticle trimmer
- Cotton pads
- Nail polish remover
- Nail clippers
- Nail file
- Nail polish
- Hand cream
- Primer
- Upper layer
Step 2: Preparation
You need to choose a place. Both nail polish remover and nail polish itself can damage fabric, wood trim or carpet. You may also accidentally stain your clothes, so wear old T-shirt and remove the rings. Place paper or old fabric to protect the table surface.
Before you start doing your manicure, make sure you have everything ready.
Step 3: Cleaning your nails

Remove old nail polish. Soak a cotton pad and gently apply it to your nails. Sometimes nail polish becomes too hard to remove quickly. In this case, place a cotton pad on your nails for a while to easily remove the old polish completely.
Do not use acetone to remove old polish as it damages your nails.
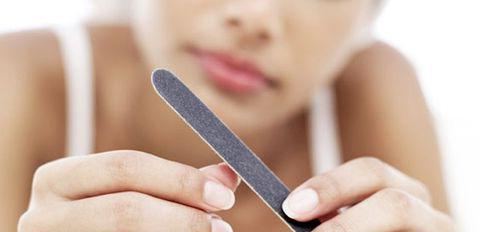
Step 4: Sharpening your nails

After removing the old nail polish, it's time to treat your nails. Use nail clippers to trim your nails. Don't file your nails too short. Shape your nails into the desired shape, rectangular or tapered, as per your choice. For a better understanding, we have added a video tutorial so you can see how a specialist treats his nails. Try creating smooth lines no corners, otherwise you will get uneven nail growth.
The nail shapes for the manicure will be determined at this stage. But this is not enough to know what manicure is and different kinds manicure, you should also know how to properly trim your nails.
Step 5: Polish your nails
 Now use a nail buffer. Polish the surface gently until it is smooth. However, don't polish too much as this will weaken your nails.
Polishing your nails is an important step in a manicure, so make sure you invest in a good nail buffer.
Step 6: Soaking Nails

Take a bowl, fill it with warm water with a few drops of soap and soak your hands in it for a few minutes. The soap solution helps remove dead skin cells and dirt from the surface of the nail while softening the cuticle.
Keep in mind that if your nails are fragile, instead of soaking them, simply rinse them.
Step 7: Forming the Cuticle

First, apply the cream or oil to the cuticles. Then carefully move it away using a special spatula or an orange stick. Never cut your cuticles and always be careful when preparing them for a manicure. Due to the removal of cuticles, the skin around the nails can become easily vulnerable.
Step 8: Applying Cream

Now use body lotion and massage on both hands. If your hand skin is dry, use a moisturizer. Avoid contact with water or detergent for at least half an hour so that your nails absorb the lotion well.
Moisturizing your nails guarantees you healthy nails and a beautiful manicure.
After going through all these manicure steps, watch this video for a better understanding of the entire manicure process!
Manicure at home - video tutorial
We hope you found this article on how to do a manicure at home useful. You will no longer spend money on salons, as you can get a beautiful manicure without leaving your home.


