Almost every family has at least one sweet tooth who loves baking. And not always such gourmets agree to be content with store-bought delicacies. That is why many housewives are forced to prepare biscuits, cupcakes, muffins, casseroles and various portioned desserts.
Silicone molds can make their work significantly easier. These products have a number of positive properties. However, to appreciate them, you need to know exactly the rules for using such “rubber utensils”. For example, it is recommended to understand in advance how to bake in a silicone mold or how to freeze food in it.
How to make the right choice?
A wide range of silicone molds often confuses buyers: which one is better to buy? After all, you really want the product to not only be absolutely safe, but also to last for many years. So what should you pay attention to?
- Temperature Range. As a rule, all molds can easily withstand the conditions of a hot oven or freezer. But before purchasing, it is still recommended to make sure that the temperature resistance limit of the material exceeds the maximum power of the oven or air fryer.
- Color. Too bright coloring of a mold often indicates the low quality of the color used in its manufacture. Therefore, it is better to give preference to products in muted tones.
- Form. As a rule, funny figures are more suitable for baking or freezing jelly: bears, roses, etc. But for baking vegetables, fish and other “serious” dishes, it is better to use classic rectangular, square or round “baths”. It should also be taken into account that the presence of small parts, such as threads, makes it somewhat difficult to wash the mold and remove the finished product from it.
- Smell. High-quality products intended for cooking should not smell.
- Company manufacturer. The more positive reviews about a particular brand, the higher the chances that the purchased item will last a long time. However, unfortunately, it is almost impossible to completely insure yourself against counterfeits.
Silicone used for kitchen utensils is inert. It does not absorb food odors, does not release toxins, does not burn or freeze to surfaces. Therefore, no matter where the silicone mold is placed - in the oven, freezer, microwave, multicooker or convection oven - we can confidently say that it is harmless.
First date rules
Before use, the new silicone mold should be washed thoroughly with a mild detergent. This will help remove dust and dirt from its walls that has accumulated there during the production, storage and transportation of the product. Then it must be wiped with a dry towel and lubricated with animal or vegetable fat.
If the mold is washed by hand after use, this operation will no longer need to be repeated. Before all other episodes of use, you only need to lightly sprinkle it with water. But after the silicone comes into contact with the dishwasher, the film of fat will have to be restored.
Both gas and electric ovens are suitable for preparing dishes in silicone molds. You can use a standard baking tray or wire rack as a support for the dishes. The latter option is considered preferable by experienced housewives, as it leads to a more uniform distribution of heat.
Place the mold on the stand before pouring liquids into it. Full dishes should only be transported together with a pallet. Otherwise, the soft walls will not be able to hold the dough or sauce, and some of the contents will end up on the floor or table.
Each housewife decides for herself whether it is necessary to lubricate the silicone mold with fat before preparing a particular dish. In principle, this is not necessary: nothing will burn to the walls or bottom. But to add additional flavor to baked goods, you can use butter or margarine. But you can definitely refuse to sprinkle the inner surface of the dishes with flour.
When setting the timer, you should take into account that the cooking process in silicone cookware proceeds faster than in metal, ceramic or any other. At the same time, the most successful temperature for baking is considered to be the range of 220-240ºC. After turning off the heat, you need to open the oven and allow the finished dish to cool slightly. This will make the process of removing baked goods easier. As a rule, it is easy to remove the sponge cake by tilting the pan slightly to one side. If difficulties arise, you can use a wooden or plastic spatula.
Other uses for silicone molds
The versatility of using soft silicone utensils practically knows no bounds. With its help you can prepare not only pastries or desserts, but also:
- ice, including from herbal decoctions for cosmetic purposes;
- Handmade soap;
- various casseroles (from cottage cheese, vegetables, meat);
- omelettes;
- aspic;
- and everything that everyday ingenuity suggests.
At the same time, all “products” will retain their original shape due to the ease of removing the mass from the soft shell. As a rule, to get out solid objects - pieces of soap or ice - you just need to press your fingers on the bottom of the cell.
Subtleties of care and storage
With proper use, silicone molds can last 5-7 years. What nuances should you remember?
- Silicone is afraid of sharp objects. Therefore, knives, forks, hard sponges and abrasive substances should not interact with it.
- To remove a thin layer of dough from the mold, it must be soaked in cool water for 10-15 minutes, and then washed, turning it inside out. Such deformation will not cause any harm to the dishes and will allow you to remove dirt even from hard-to-reach places.
- To store silicone products you need very little space. Any mold can be rolled or rolled into a tube without fear. After the fixative disappears, the silicone will return to its original form.
- High-quality forms do not react in any way to sudden changes in temperature. In other words, even immediately after being frozen, they can be safely placed in the oven or microwave.
- Silicone is afraid of open fire and too hot surfaces. Therefore, it cannot be placed on a gas or electric burner. You also need to make sure that it does not come into contact with the heating element in electrical appliances.
- To protect the inner surface of silicone cookware from contamination during baking, you can use special paper liners.
- Some forms sometimes darken from the inside. This should not be considered a defect.
Knowledge of such little things will allow you to make silicone cookware a reliable and faithful assistant in the kitchen for many culinary experiments.
A hospitable housewife always wants to please her household and guests not only with tasty and healthy, but also beautiful dishes. It is the appeal of desserts, casseroles and decorations made with silicone molds that has allowed these utensils to become so popular. Ease of storage and use soft goods only added to its advantages in the eyes of housewives who strive to reduce routine to a minimum.
THE WHOLE TRUTH ABOUT SILICONE BAKING Molds - + MANY RECIPESHow to use silicone baking molds: nine important rules and interesting recipes for baking and jelly, in large and small forms and tablets. Good luck to you!!!
Many housewives have already appreciated the ease of using silicone molds. These forms are made from chemically inert silicone that does not emit when heated. harmful substances- This is the material that medical implants are made from.
Of course, if you want to not only use silicone baking molds, but also be absolutely sure of their safety, buy products from well-known, well-established companies.

All kinds of kitchen utensils are made from silicone - spatulas, brushes, potholders, hot pads and even knives. However, the palm is, of course, occupied by silicone baking molds of all kinds, sometimes the most bizarre shapes.
If you are still not one of their lucky owners, perhaps you simply do not know how to use silicone baking molds correctly. Then read the article and fill the knowledge gap!

. Rule 1
Silicone forms, unlike glass and metal ones, they are distinguished by increased flexibility, so you need to pour dough into them when they are already on a baking sheet or wire rack. Otherwise, acrobatic manipulations are inevitable in an attempt not to spill the batter and, as a result, a spoiled mood and dissatisfaction with the form.
. Rule 2
Feel free to use silicone molds in any oven - gas, electric, microwave. Put them in the freezer too. Such forms can easily withstand temperature changes from -40°C to +240°C, so they are excellent not only for baking, but also for freezing.
. Rule 3
Manufacturers recommend lubricating the silicone mold before you start using it only once, the very first time. I personally didn’t grease it, and I never had any difficulties with removing finished baked goods. If in doubt, and it makes you feel better, grease the pan before each baking - it definitely won’t do any harm. Just remember to wash your silicone mold with a mild detergent before you start using it.
. Rule 4
Please note that baking time in silicone molds is almost the same as in regular ones. At least I didn't feel any difference. Please also note that the crust forms only on top, the bottom of the baked goods turns out moist.
. Rule 5
Remove the baked goods from the pan after allowing it to rest for five to seven minutes. Then simply tilt the pan to one side - the finished baked goods will fall out of the pan themselves without any effort on your part. If the baked goods still stick and cannot be removed, bend the edge of the mold outward; fortunately, silicone allows you to do this without problems. First, pick up a stuck cake or pie from the side with a silicone or wooden spatula. Do not use metal knives or forks to remove baked goods - you will pierce the pan “at once”.
. Rule 6
Feel free to use silicone molds not only for baking pies and muffins, but also for preparing dishes from meat, fish, and vegetables. Naturally, in this case, choose a round, rectangular or square shape.
. Rule 7
When purchasing, choose silicone molds with a minimum of decor, with smooth, even edges without small “carvings.” Otherwise, problems may arise both with removing the finished baked goods from the mold and with the subsequent washing of this “thread.”
. Rule 8
Although baked goods in a silicone mold do not burn, after removing it, a thin layer of dough remains on the walls of the mold. To wash this layer, first soak the mold for five to ten minutes in cool (this is important!) water. Then carefully turn the mold inside out and lightly rub with a soft sponge - the remaining dough will come off without any problems even from the smallest grooves. Do not use harsh abrasives.
. Rule 9

When storing, bend the silicone molds in any way you like, roll them into a tube, stick them in narrow cabinets and in the far corners of shelves - they will not wrinkle, do not deform and will return to their original form instantly.
These are the basic rules that you need to know before you start using a silicone baking dish - as you can see, there are not very many of them and they are all quite simple.
Recipes for small silicone molds
Recipe1
CHOCOLATE BISCUIT IN MICROWAVE IN 5 MINUTES
"Little bear." In general, preparation takes no more than 5 minutes: 2 minutes to prepare the dough and exactly 3 minutes in the microwave.
Chocolate sponge cake in the microwave in 5 minutes
1 small egg
4 tablespoons milk
3 tablespoons vegetable oil
2 tablespoons (without top) cocoa or instant chocolate
2 tablespoons (without top) sugar
4 tablespoons (without top) flour
1 coffee spoon baking powder
Preparation:
Mix all dry ingredients, add egg, vegetable oil, milk until you get a liquid dough,
place the mold with the dough in the microwave for exactly 3 minutes at maximum power
IMPORTANT: fill the form no more than 1/2 full, the dough will rise greatly
Chocolate lemon cake in silicone mold
Ingredients: 4 eggs;
half a pack of margarine;
1 cup of sugar;
1 cup sour cream (or yogurt)
2 cups of flour;
2.5 teaspoons baking powder;
1 bar of dark chocolate.
First you need to put the chocolate in a water bath to melt. Sift flour with baking powder. Separately, grind margarine and sugar until smooth. Add eggs, beat a little with a mixer, then carefully add sour cream, mix with a spoon. Add melted chocolate and stir immediately until liquid. And then add the sifted flour with baking powder. Mix with a mixer, but not for long. Place in silicone molds and level. Bake for about 20-25 minutes at 250 degrees. PS: They come out simply magical with grated chocolate and almonds. Grind almonds in a blender. But grated dry ingredients must be added to flour! You can make lemon ones. To do this, add the zest of one lemon to the dry ingredients, and the juice of half a lemon to the “wet” ones.
summer cupcake option
Juicy blueberry muffin
200 g butter
200 g sugar
200 g flour
~ 200 g blueberries
4 eggs
1 tsp baking powder
2 tbsp. powdered sugar (for decoration)
Mixer Beat butter, sugar and eggs. Sift flour, baking powder and dough mixture. Grease a cake pan with a thick layer of butter and sprinkle with breadcrumbs. Mix blueberries with a small amount of flour (so that the berries are evenly distributed in the dough). Add to the dough. Stir, place in a silicone mold, level and bake for ~ 40 minutes at 180-200 C. Remove the pie from the oven and leave in the mold for 10 minutes. Then tip onto a cake rack and cool completely. Sprinkle with sifted powdered sugar.
Ginger - Lemon Cake
Required Products:
- 1.5 cups flour;
- 1 cup of sugar;
- 1 glass of sour cream;
- 3 eggs;
- 0.5 packs of margarine;
- 0.5 packs of baking powder;
- lemon (zest and juice of half a lemon);
- 2 teaspoons grated ginger.
Beat eggs with sugar until sugar is completely dissolved. Melt margarine, grate ginger and lemon zest. Mix eggs with sour cream, margarine, ginger and lemon zest. Add the juice of half a lemon. Add flour and baking powder, mix with a spoon. Sprinkle the cake pan with flour. Place in the oven, heated to 220-250 degrees for 45 minutes. Drizzle with glaze (1 tbsp lemon juice, 1 tbsp water, 4 tbsp powdered sugar)
Almond cake in silicone mold
Ingredients: 4 eggs, 1 tbsp. Sahara,
3\4 cups starch,
3\4 cups flour, 1\2 p. margarine,
3 tbsp. l. oils,
1 1\2 tbsp. l. vinegar,
1 tsp powder for cookies,
almond butter, powdered sugar.
Preparation: Mix flour, starch and cookie powder. Separate the yolks from the whites. Margarine with 3\4 cups of sugar (reserve 1\4 for the whites) and beat the yolks. Gradually add vinegar and oil, a mixture of flour and starch, and butter to the mixture, stirring constantly. Beat the whites until foamy, add sugar at the end and combine with the dough. Grease the pan, sprinkle with flour, and bake in a preheated oven (180) for 50 minutes. Sprinkle the cooled cake with powdered sugar.
Delicious cupcake in silicone mold
Recipe
Flour - 150 g
Starch - 50 g
Oil - 200 g
Sugar - 200 g
Egg - 5 pcs.
We need eggs and butter room temperature. Beat the butter for 5 minutes. mixer.
Add all the sugar and continue beating for another 10 minutes.
Break all the eggs into a separate container and (IMPORTANT) pour literally a spoonful into the butter-sugar mixture, continuing to beat. This process of killing the eggs takes 15 minutes, we need all the sugar to dissolve. The butter-egg mixture should be silky, smooth, and very tender.
Sift flour and starch (several times). Pour the sifted mixture into our mixture and stir thoroughly, not for long.
Pour the dough into silicone baking molds.
Preheat the oven to 180 degrees and bake the cake for 50 minutes.
Take out the cupcakes and leave in the pan until completely cooled, transfer to a plate and sprinkle with powdered sugar.
Cupcake recipe
Melt 200 grams of margarine over a fire, add 1.5 cups of sugar, 4 tablespoons of cocoa and 100 ml of milk. This should all boil and cool.
Separately beat 4 eggs. Add to cooled mixture, plus 1 cookie powder and 2 cups flour.
Mix all this well and pour into a silicone mold. Bake for 45 minutes. You can add nuts, raisins, and candied fruits to the cake. Bon appetit!
Cake
For the dough: 2 tbsp. flour;
250 gr./1p. margarine,
1.5 tbsp. powdered sugar,
6 eggs
4 tbsp. spoons of butter,
2 tsp. cookie powder
0.5 tbsp. poppy seeds and 0.5 tbsp. (25 gr.) coconut flakes,
2 tbsp. cocoa.
Grind margarine and powder with a mixer, adding one yolk at a time. Next, add flour and cookie powder, butter and grind. At the end, mix the dough with the whites whipped into a thick foam. We divide it into three parts. Add poppy seeds to one, cocoa to the second, and coconut flakes to the third. Grease the mold with margarine, sprinkle with flour, and spread the dough evenly: with coconut on the bottom, then with cocoa, and with poppy seeds on top. Bake for 45-50 minutes at medium temperature. You can check readiness with a toothpick.
Cupcake 2
Ingredients:
2 eggs
200g sugar
200ml sour cream 20%
300g flour
1/2 packet of cookie powder
2 tbsp cocoa
100g dark chocolate
1 tbsp. l cognac
100g butter
Preparation:
Beat eggs, add sugar and mix. Then add sour cream and stir until the sugar is completely dissolved. Add butter, flour, cookie powder and knead into a soft dough. Divide the dough into two equal parts, add cocoa to one and mix. Grease the baking dish with any fat. Place a tablespoon at a time in the middle, alternately white and dark dough. Bake for 50 minutes 170 C. Cola, once the finished cake has cooled completely, pour chocolate over it: melt the dark chocolate over low heat, adding 1 teaspoon of cognac and 1 teaspoon of water. It turns out striped like a zebra
Cupcake with filling
You will need: - flour 1 cup - sugar 3/4 cup - a little vanilla - soda 0.5 tsp. - baking powder 0.5 tsp. - melted butter 40 g. - egg 1 pc. - milk 1/3 cup Take all the ingredients at once, put them in a bowl and mix with a mixer or blender for 2-3 minutes until smooth. These cupcakes can be baked with or without filling. Frozen blueberries and currants. We put the filling on the bottom of the mold, fill it with dough, and then mix it with a spoon so that the berries are not at the very bottom. Bake at 180 degrees for 25-30 minutes.
Chocolate muffins
First, mix: 250g - flour 100g - cocoa 1 tsp. - Cookie powder 1/2 tsp. - Soda 1/2 tsp. - Salt Mix separately: 250g - sugar 100g - I melted butter in the microwave and cooled a little 2 - eggs 200g - kefir 1p. - Vanilla sugar Then I combine everything and add 200g of chocolate
Place the dough in the pan and bake for 25 minutes in an oven preheated to 200C.
Cupcake with raisins icon form
cupcake recipe: 1 tbsp.oil 1 tbsp sugar 2 eggs Grind all this. Ext. add 100 g margarine, 1 tsp slaked soda with vinegar, 1.5 tbsp. flour. Mix everything, add raisins, pour into a mold and bake at 180 degrees for about an hour. When cooled slightly, sprinkle with powdered sugar.
CAKE IN THE BREAD MAKER
Eggs - 3 pcs.
Butter (melt) - 70 g
Salt - a pinch
sugar - 200 g
Flour - 320 g
Juice of 1 lemon
Raisins - up to 100 g (as there are no raisins, dried apricots and dates are used)
Cognac - 2 tbsp.
1 tsp soda, quenched with vinegar (or 2 tsp baking powder) Beat eggs well with sugar and salt, add melted butter, cognac, lemon juice, flour, raisins and soda, quenched with vinegar. As a rule, this cake is baked in a bread maker in the “Baking” mode for about 1 hour 20 minutes (approximately, the “Baking” program has 1 hour, and when it ends, it is turned on again and watched over the cake, as a rule, another 15 are added -20 minutes.). However, it bakes well in the oven at 180.
Cupcakes in silicone molds 3 minutes in the microwave
Let's quickly and deliciously prepare a cupcake in silicone molds! Everything will take 3 minutes.
4 tablespoons (tbsp) flour, 6 tbsp. sugar, 2 tbsp. cocoa, a pinch of vanilla - mix in a plate. Beat 1 egg and add to the plate, mix. 3 tbsp. milk, 3 tbsp. Pour the oil into a plate and stir. The consistency of the dough is similar to sour cream. Add 1/3 teaspoon of soda quenched with vinegar. Pour into silicone molds (half the mold!) and microwave for 3 minutes, then leave to cool for a minute. During the baking process, the cake will rise well, and when it cools, it may settle somewhat. It is quite easy to remove from silicone molds. We get 6 small cupcakes.
Happy cooking and happy eating!
Recipes for large silicone molds
Cupcake Bear Barney
Barney Bear cupcake: 1 pack of margarine (grate),
0.5 l. kefir,
3 eggs, 1 cup sugar, 1 pack of vanilla sugar, baking powder, 2 cups flour. Beat with a mixer until smooth. Place the mold on a baking sheet, pour in 2/3 of the dough, put the oven on, bake, and test for doneness with a toothpick.
Large silicone molds Quick recipe
2 eggs +1 tbsp. sugar = beat
0.5 cups sour cream
1 tsp quench soda with vinegar
Melt 0.5 packs (100 g) of margarine
2.5 tbsp. flour
50-70 g raisins
Mix everything together. Place in a large silicone mold and bake for 20 minutes.
Recipe for any large silicone mold
175 g sugar
175 g butter
175 g raisins
140 g eggs
240 g flour
1/2 tsp. baking powder for dough
a pinch of salt
Vanilla sugar
For this recipe, it is very important to stick to the exact quantities of ingredients. With eggs it’s simple - 140 g is three medium eggs and I take a little protein. (But I still weigh it) Keep the butter at room temperature for half an hour, grind it with sugar in a blender or mixer until fluffy, add one egg at a time, beat well, the next egg, etc. Wash the raisins and dry them on a paper towel. Add them to the butter mixture, add a pinch of salt and mix everything well. Separately, sift the flour, baking powder, add vanilla sugar. Then carefully add the flour to the mixture with butter and mix well at low speed (I just do this with a spoon). I grease the mold well with oil, lay out the dough and level the surface with a wet spoon. I wet it with water and use it to make a deep longitudinal cut on the cake. It will supposedly drag on later, but when the cake starts to grow, it will appear and will not give the cake the opportunity to burst where it should. The oven is preheated to 160 degrees, bake for approximately 80-100 minutes. Carefully remove from the mold, set to cool on a wire rack (to avoid wet sweat), sprinkle with powdered sugar while hot.
Lemon cake recipe fragrant baking
10 eggs
1.5 cups sugar
250g butter
2 tsp powder in cookies
2 lemons
400g flour
Boil one lemon for 15 minutes. cool and grind. Add 1.5 cups of sugar and beat, add soft butter - beat. Gradually add one yolk at a time and beat. Add juice from another lemon. Mix flour with powder and mix with this mass. Separately beat 10 egg whites and carefully mix into the mixture. Grease the mold and sprinkle with breadcrumbs. Bake for 50 minutes at a temperature of 160 degrees. Pour chocolate on top.
Vanilla cupcake in silicone mold
kefir-0.5 tbsp.
sugar-1 tbsp.
margarine-100 gr.
egg-2 pcs.
vanilla sugar-1 p.
baking soda, quenched with vinegar - 1 tsp.
flour-2.5 tbsp.
raisins, dried apricots,
powdered sugar
Mix kefir with sugar and vanilla sugar. Add eggs and beat. Then add melted and cooled margarine + soda, flour and mix thoroughly. The dough should not be too thick (like pancakes, but a little thicker). Cut the dried apricots into cubes and roll together with the raisins in a small amount of flour (so that when baking they do not sink to the very bottom). Add dried apricots and raisins to the dough, mix and place in a mold greased with oil and sprinkled with semolina (butter on top). Bake for approximately 30-40 minutes. Sprinkle the finished cake with powdered sugar.
Chocolate Valentine's Cake
Dough:
½ cup unsweetened cocoa powder
½ cup hot water
¾ cup flour
¾ teaspoon baking soda
½ teaspoon salt
4 large eggs
1 ¼ cups granulated sugar
¼ cup vegetable oil
¼ teaspoon cream of tartar
White Chocolate Glaze:
1 2/3 cups (11 ounce package) white chocolate chips
1/3 cup milk
1 ½ cups unsalted butter, room temperature
1 teaspoon pure vanilla extract
2 ½ cups (powdered) sugar
2 tablespoons unsweetened cocoa powder
Tip: Use standard measuring cups and spoons or scales for accurate measurements.
Process:
- Preheat the oven to 200 degrees Celsius Prepare a silicone heart mold or round shapes for the cake: lightly grease the bottom of the pan
Tip: If you don't have a silicone heart mold, cut a heart shape out of paper to use as a template. Bake the cake in a round silicone mold. Once the cake is baked and cooled, use a sharp knife to cut the cake into a heart shape.
Dough:
- In a small bowl, combine cocoa and hot water; move until they are completely connected, smooth out; set aside to cool.
- In a small bowl, combine flour, baking soda and salt, sift or whisk together. Set aside.
- In a large bowl with an electric mixer, add the egg yolks and beat 3 to 5 minutes on medium-high speed until foamy and the egg yolk is thick and lemon-colored. With mixer on medium speed, gradually add 1 cup sugar, either one tablespoon at a time, or in a very slow steady stream, taking 4 to 5 minutes to add all the sugar, and beating until eggs and sugar are fully incorporated . Scrape down the sides and bottom of the bowl with a rubber spatula so the mixture is evenly distributed. the mixture will be thick and pale yellow in color.
- With mixer on medium speed, gradually pour butter into dough in a slow, steady stream. Add vanilla and continue stirring for another 1 minute until everything is well combined.
- With mixer on low speed, gradually add about ½ of the flour mixture, mix just until combined, then add remaining half, mix until thoroughly combined, scraping down sides of bowl as needed.
- Using a whisk or large rubber spatula, gently fold the chocolate mixture into the batter.
- In another large bowl and using clean beaters, beat the egg whites with an electric mixer until foamy. Gradually add the remaining ¼ cup sugar and continue beating until stiff. Mix the egg whites into the dough. Bake:
- Spoon the batter into the prepared silicone molds and smooth the surfaces to the back with a large spoon. Bake for 20 to 25 minutes or until a toothpick comes out clean. Remove from oven and pan onto cooling rack to cool for 10 minutes, then remove cake from pan and place cake on cooling rack to finish cooling. White glaze:
- In the top of a double boiler, combine white chocolate chips and milk. Place a pan of boiling water (the top pan should not touch the water.) until the chips melt and the mixture is smooth. Remove from heat, add butter, vanilla and powdered sugar. Mix by hand or beat with a hand mixer for 2 to 3 minutes until the frosting is thick and smooth.
- Divide the glaze in half and place ½ in a separate bowl. Add cocoa to ½ of the glaze.
- Spread the white chocolate frosting between the 2 layers and over the top of the cake. Apply cocoa frosting to the sides of the cake.
- Use a piping bag to decorate the cake.
- Enjoy the work done
Recipes for jelly and ice in silicone molds
Ingredients:
600 gr. Cottage cheese.
300 ml milk.
36 gr. gelatin,
180 ml water,
150 gr. Sahara,
50 gr. cocoa.
Combine cottage cheese with sugar and mix well.
Divide the mixture into 3 parts.
Heat 2 tsp on the stove. cocoa and 2 tbsp. milk, boil a little until the cocoa dissolves. Cool and add cottage cheese and sugar to the first part.
Next, heat the milk (3 tbsp) with the rest of the cocoa (3 tsp), dissolve well and also add to the second part of the cottage cheese and sugar.
Then mix 300 ml of milk and 180 ml of water.
12 gr. gelatin, pour 160 ml of a mixture of water and milk and place in a water bath until completely dissolved, but do not boil.
Add dissolved gelatin to the first part of the cottage cheese and cocoa (light chocolate). Place this mixture in the freezer for 5 minutes.
Next, dissolve 12 g. gelatin also in 160 ml of a mixture of water and milk and add to the white mass (without cocoa), you can also add crushed walnuts.
Take the first part out of the freezer, add another and put it back in the freezer for 5 minutes.
Then again 12 gr. Dissolve gelatin in the remaining milk and water (160 ml), add to the 3rd part (dark chocolate) and pour jelly into those parts.
Now just put it in the refrigerator for 4-5 hours. Remove from mold.
You can pour melted chocolate on top and sprinkle some nuts
Recipes for silicone molds
Recipe for baking in the shape of a Barney bear
Any biscuit - with kefir, cottage cheese, jam, etc. - ideal for baking in silicone molds.
Everything you are used to cooking in traditional forms for baking can be prepared in silicone molds.
In addition, silicone molds give us new opportunities. They prepare jelly, chocolate, and make ice, which would be impossible to prepare in metal molds. We tried many of the baking recipes that you will read in this article ourselves.
Barney Bears Recipe
Ingredients (recipe ingredients):
1 pack of plums. butter, 1 tbsp. kefir, 3 eggs, 1.5 cups sugar, 1 packet of baking powder, vanillin (you can do without it), 2 cups flour, cocoa
Cream: melted chocolate or boiled condensed milk or chocolate-peanut butter
Recipe:
Step 1: Beat eggs with sugar, add melted butter and kefir.
Step 2: Sift the flour. Combine and knead the dough. Take 1/6 of the dough and add cocoa there.
Step 3: Stir everything until smooth and fill the bear molds two-thirds full. Fill the bears' paws with cocoa dough.
Step 4: Bake the Barney bears at 180 degrees for about 30-40 minutes. Cool, remove from mold.
Step 5: Chocolate melted in a water bath, or boiled condensed milk or chocolate-peanut butter should be injected with a culinary syringe into the already baked bears.
Recipe2
CUPCAKES
3 eggs;
200 gr. margarine;
2 tbsp sugar;
2 tbsp. kefir;
1 tsp soda;
4 tbsp. flour.
raisin.
Grind the eggs with sugar, add margarine (melted but warm), kefir, add soda and flour, raisins. Mix the dough with a spoon, it should be like thick sour cream.
Fill the molds halfway
Canelé recipe in silicone mold No. 4
You can add vanilla essence to the dough for flavor.
Cooking time 1 hour + 24 hours, 8 servings, 100 g - 380 kcal
500 ml milk
135 g flour
The bathroom is a special room in the apartment, which is almost always warm and humid. Such conditions are a favorable environment for the appearance there. It will be quite difficult to get rid of them in the future. Therefore, all cracks and gaps at the joints of surfaces in the bathroom must be sealed during renovation. And for these purposes, silicone sealant is most often used. And in order to do everything carefully, you need to first familiarize yourself with how to use it correctly.
Application of silicone-based sealant
Eat different types sealants, and the most common is silicone. It has excellent properties and is perfect for sealing joints in bathrooms. There are two types: acidic, used only for metals that do not rust, and neutral, used for any surface. It is the neutral sealant that is most often chosen for bathrooms. Among the advantages of silicone sealants are:
- high degree of strength;
- excellent elasticity;
- good resistance to temperature changes;
- excellent water-repellent characteristics;
- long service life.
Attention! The best option for bathrooms would be silicone sealant labeled “sanitary”. It contains special antibacterial additives that prevent the formation of fungus.
Preparing surfaces for sealant
Using silicone sealant is very easy. But first it is necessary to carry out preparatory work in the places where it will be used. Surface preparation consists of three stages:

The sealant allows you to reliably seal all joints and seams
- cleaning joints and seams in the bathroom from dirt and dust - you can use a vacuum cleaner for this purpose;
- degreasing surfaces intended for sealing with sealant - to do this, wipe the cleaned seams with acetone or alcohol;
- drying the work surface - wipe it dry or do it with a hair dryer.
Attention! Careful preparation of the seams in the bathroom for the sealant will ensure its best adhesion to the surface.
How to use sealant
Silicone sealants are sold in standard packaging - tubes. Before you start using the product, you need to prepare it. To do this, cut the tip of the tube at an angle, which makes it easier to apply the silicone, and put on the cap included with the sealant. After this, the prepared tube is inserted into a special gun and fixed in it.
By inserting the tip of the tube with sealant deeper into the seam, you need to apply silicone evenly over the entire surface to be treated. The force of pressing when working with a gun must be compared with the moderation of movement along the gap or joint. This will result in a smooth and beautiful seam. Silicone serves to protect the surface from moisture penetration. Therefore, saving sealant would be inappropriate here. All voids in the seam being processed must be filled. If this is not done, then when the silicone dries, cracks may form between the surface itself at the joint and the sealant.
The seam may not always turn out perfectly straight the first time. There's nothing wrong with that. Before the sealant has time to harden, you can remove its excess and level the seam with a rubber spatula slightly moistened with water, or use a small scraper made from a piece of plastic for this purpose. Many people smooth out the seam simply with their finger when nothing suitable is at hand. But it’s better to at least wet your finger in a soapy solution before doing this.
Advice. In order not to stain the surfaces adjacent to the seam with silicone, it is better to stick mounting tape along it before applying the product as close to the joint as possible and remove it after completing the work.
How long does silicone bathroom sealant take to dry after application?
Drying times for silicone sealants vary from manufacturer to manufacturer. But regardless of its composition, it can dry in different ways. This depends on the type of surface, the thickness of the applied layer, and the temperature in the room. The top layer of sealant ceases to be sticky after about 20-30 minutes, but inside it still remains liquid.
After a few hours, the silicone hardens and takes about a day to dry completely. For deep and voluminous seams, it may take even more time - up to two days. And all this time it is necessary to protect the composition applied to the seam from moisture that may get on it, that is, it is better not to use the bath.

Applying sealant
How to remove old silicone sealant
Before sealing gaps with sealant during repairs, the seams must be thoroughly cleaned of the old layer of silicone. You can remove it:
- mechanically - sharp knife scrape off the already hardened, old layer of silicone;
- using special means - sometimes a layer of old sealant cannot be removed with a blade or knife. In this case, special removers and solvents will help remove it.
The best way to dissolve silicone sealant
A small amount of this product can be wiped off with alcohol, gasoline, or white spirit. There are plenty of different solvents on sale that can be used to remove sealant from the surface. But most of them do not completely clean the silicone, but only soften it. But after that it will be much easier to remove it. But it is worth keeping in mind that all of these products may have some restrictions on use on certain types of surfaces. Therefore, you first need to try them in an inconspicuous place.
Silicone-based sealant is a convenient and practical product, and it is quite easy to use. Using it in the bathroom can effectively protect this room from the appearance of traces of mold and mildew.
How to use silicone sealant: video
Silicone sealant: photo


In the bathroom, all surfaces are exposed to a humid environment and frequent temperature changes. Therefore, it is very important to seal not only the seams between the tiles, but also the joints at the border of the wall and the bathtub, washbasin or other surfaces. Silicone sealant is perfect for this.
Main advantages
In order to make pipe joints between the wall and the bathtub, sealant must be used. The range of building materials offers several options based on different polymers. Suitable for use in bathrooms:
- Silicone.
- Acrylic.
- Silicone-acrylic.
- Polyurethane.
Silicone-based sealant is the most suitable option, which will help firmly bond the surfaces. It is different:
- Resistant to temperature changes. Manufacturers indicate the boundaries within which the substance fully retains its properties, this is from -50 to + 200 degrees Celsius.
- Excellent adhesion. It adheres well to all materials used to furnish a bathroom (tile, metal, acrylic, wood, glass).
- Duration of operation.
Silicone-based sealant has excellent adhesion and resistance to temperature differences
But you need to remember that such sealant is more expensive than others. Although you shouldn’t skimp on creating a safe bathroom.
How to choose the right option
- Moment.
- Penosil.
- Tytan.
- Ceresit.
These manufacturers offer packages of different sizes. In addition, a coloring agent is added to the main composition, which allows you to select a sealing material that is invisible on any surface.
Advice! For home work, it is better to buy 2-3 small tubes of sealant than 1 large one. In a large open container, the substance quickly becomes unusable.
Some options have additional components that help resist silicone sealant to various microorganisms and fungi. Such compositions are called sanitary sealants. They are best used in rooms with high humidity.
When choosing, you must also remember that the composition can be:
- Acidic - acetic acid is added to the composition, because the substance has a pungent and unpleasant odor. This sealant cannot be used on metal surfaces as they are exposed to acid and will quickly rust. The putty is suitable for working with wooden and ceramic surfaces.
- Neutral. This option is universal and does not harm any known substances.
Attention! Additional components in the composition should be less than 10%. A higher value worsens the properties of the sealant.

Currently on the market a wide range of various sealants
Rules for working with sealant
Buying a quality product is only half the battle. It is also important to use it correctly to get the desired result. Therefore, when working with silicone compounds, you need to consider the following subtleties:
- The composition is applied only to a dry and clean surface. This means that you need to carefully prepare the place where the substance will be applied. The base is washed, dried and degreased with alcohol or acetone.
- After drying, silicone sealant is difficult to remove from surfaces, so the borders must be covered with masking tape. The more carefully the stripes are glued, the more inconspicuously the putty will be applied.
- You need to squeeze the substance out of the tube evenly, without making any gaps.
- Before the composition hardens, you need to level the applied layer. To do this, use a soft spatula or cloth soaked in water and wrapped around your finger in one layer.
Attention! The tool should only be used in the direction in which the sealant was applied. Otherwise, unevenness will form.
- The masking tape is removed before the sealant hardens. Once the substance hardens, it will be difficult to tear it away from the total mass. Then you will have to trim, and this may lead to a violation of the tightness.
- Hardening time and complete drying time are completely different indicators. The hardening time is about 30 minutes, after which the substance dries and stops sticking to the fingers, complete hardening takes from 6 to 24 hours (depending on the thickness of the layer, temperature and humidity), the period of time after which the sealant acquires all its properties.

Using sealant is not particularly difficult even for a non-professional
Resealing
It often happens that the applied layer becomes unusable due to various reasons(covered with fungus, peeled off due to improper application). You can find many photos on the Internet showing this problem. Then the procedure must be repeated again.
But now you need not only to carefully prepare the base, but also to remove the old layer. This will not be so easy, since, as stated above, silicone sealant adheres strongly to materials.
The putty can be cut off. To do this, choose a knife with a thin and sharp blade or special construction. The remains are cut off carefully and very carefully. Please note that you cannot leave even a small piece, otherwise the new layer simply will not be able to perform its functions.
To remove absolutely all the sealant, you need to use a special softener, which is applied 2 times thicker than the rest of the sealant. After the procedure, everything is removed with a cloth. Next you need to apply silicone sealant after degreasing the surface.
In order to understand in more detail the instructions for applying the sealant, you can watch the video.
Video: Silicone sealant
High-quality containers meet basic operating requirements: withstand high temperatures, provide good thermal conductivity, have non-stick properties and good wear-resistant characteristics, are practical and durable.
Types and characteristics of baking dishes
Baking containers differ in shape, diameter, volume, purpose and material.
Main types
Baking dishes come in the following types:
- round;
- rectangular;
- square;
- oval;
- triangular;
- multifaceted;
- curly (heart, star, drop, animal or fruit figures).
In addition, they are available in a one-piece or removable design. The latter consists of a removable bottom with a smooth or textured surface and sides. Molds of this type are used for preparing confectionery products from shortbread and biscuit dough.
The types of shapes in demand are round, wavy, curly, detachable, for cupcakes (with a recess), Easter and Easter cakes, mini-cakes.
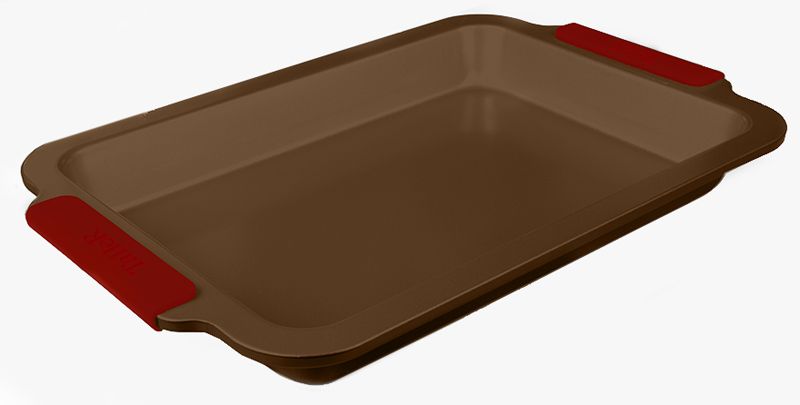
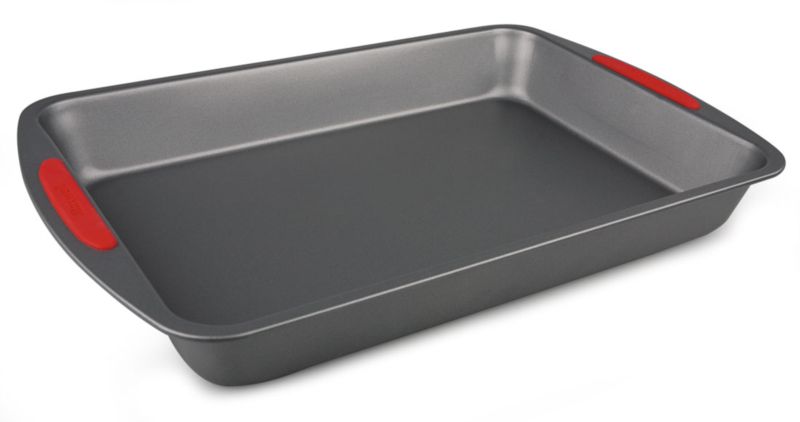
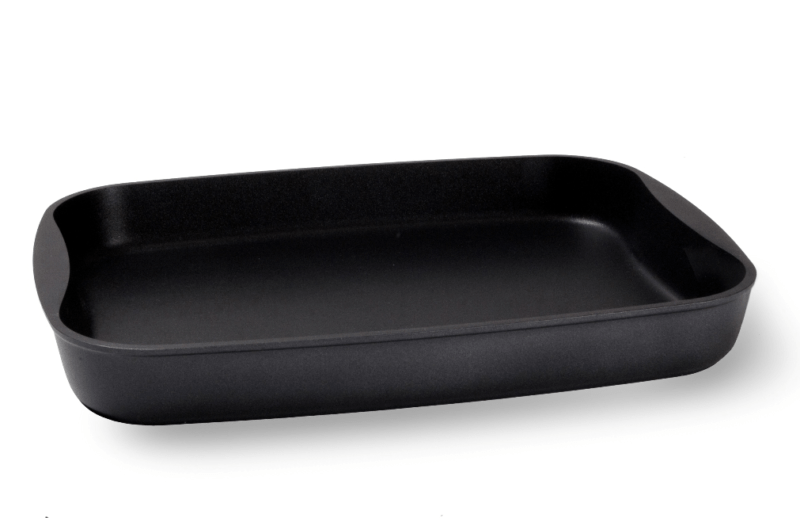
- Round products used for making cakes from any type of dough. When choosing round dishes, it is important to pay attention to the height of the sides: for pizza and pies it is 2 cm, for cakes and bread – up to 7 cm.
- Wavy products are intended for baking baked goods and cakes, and the original sides give the finished dish an attractive appearance.
- Figured containers used to prepare custom desserts in the shape of flowers, hearts and other objects.
- Split dishes designed for preparing cakes and biscuits. It consists of two parts - a removable bottom and a side wall, connected using a special clamp.
- Cake containers, Easter and Easter cakes are presented with a special design that speeds up the process of preparing homemade baked goods.
- Mini molds for tartlets, cupcakes and muffins differ in configuration and volume. They are suitable for preparing desserts of varying complexity.

For each type of dish, there are molds with different diameters and heights of sides. The diameter of the container determines the number of servings that are prepared at one time.
- Small: diameter 11-18 cm;
- Medium: diameter 20-26 cm;
- Large: diameter 26-33 cm.

This characteristic is important for all types of cookware. A large baking dish is designed for preparing a large number of servings and vice versa. Thus, a container with a volume of 3-4 liters will allow you to prepare a dish designed for a family of 3 people.
Classification:
- small: 0.25-1.2 l;
- medium: 1.4-2.2 l;
- more than average: 2.3-3.1 l;
- large: 3.5-5 l.

Baking utensils are intended for cooking:
- gingerbread;
- tartlets;
- bread and rolls;
- cupcakes, muffins and eclairs;
- Easter;
- cookies;
- pies;
- cakes;
- puddings;
- casseroles;
- rolls;
- souffle.
Classification by material

Majority modern forms for baking is made of stainless steel. They are durable, practical and wear-resistant. Thanks to the thin sides of the steel pan, baked goods cook faster even at low temperatures.
The heating rate depends on the type of metal used to make the mold. Containers made of light stainless steel heat up more slowly than those made of dark steel.
In steel forms it is provided different type the internal coating is made of tin, aluminum and Teflon.
Important! Only metal molds have a removable design. In such containers, the sides can be of different thicknesses - thin (2 mm) and thick (1 cm).
High-quality steel products have a reliable design, properly sealed seams, and are resistant to deformation and mechanical damage.

A practical and durable material that is popular with consumers. Cast iron containers are used for preparing homemade baked goods, desserts, and for roasting meat, fish and vegetables.
They have a reinforced bottom and thick walls for even heating of food. Cast iron cookware prevents burnt bottoms and soggy middles.

They are characterized by good thermal conductivity and fast heating, which leads to faster baking. Aluminum containers are intended for preparing cookies, cake layers, muffins, muffins, tartlets and pizzas.
When using the mold, it is necessary to adhere to the exact cooking time. This will prevent the food from burning or undercooking.

In terms of thermal conductivity characteristics, ceramic cookware is not inferior to cast iron products. Slow and even heating ensures quality cooking.
Ceramic baking dishes are universal, they are intended for use in ovens and. Ceramic containers have thick, finely porous walls for proper heat distribution.
This ensures that food simmers slowly and retains nutrients.

The Teflon coating can withstand high temperatures, so it is convenient to cook dishes in such containers that require a cooking temperature of over 200 degrees.
To ensure long service life for Teflon containers, it is recommended to use wooden or silicone spatulas and spoons for them. The inner coating of Teflon cookware is made of aluminum or stainless steel.

For those who rarely prepare pastries, the best option will become paper disposable baking dishes. They are made of multilayer parchment, paper or cardboard and are resistant to high temperatures.
Products are presented in blocks of 36, 24, 12, 6 pieces on a single monolithic base or separate stands.

Baking dishes of this type are made of heat-resistant tempered glass, resistant to low and high temperatures, microwaves and abrasives. The material is able to retain heat, so dishes in such dishes cool down gradually.
Glassware is used for preparing charlottes, pies and casseroles from vegetables, fish and meat. Glass is safe for use in gas and microwave ovens.

The material is able to withstand a temperature range from -41 to +230 degrees, so such containers are intended for baking and freezing foods. They do not require constant lubrication.
To get the finished dish, you need to carefully turn the sides of the container inside out. Silicone containers of different diameters and colors are intended for preparing homemade baked goods and confectionery products.
pros

- Stainless steel is resistant to the aggressive effects of acid-base compounds.
- The surface can be polished or matte.
- The material is hygienic and safe for use at high temperatures.
- Simplicity in daily care and operation.
- Affordable price.
- Slow and even heating.
- Durability, practicality and wear resistance of the material.
- Resistance to mechanical damage, corrosion and the negative effects of detergents.
- Affordable price.
- Fast cooking.
- High thermal conductivity.
- Low cost.
- Light weight.
- Practicality.
- Attractive appearance.
- Preservation of useful microelements and vitamins when preparing various dishes.
- Slow and uniform heating of the surface, retaining heat for a long period.
- Environmentally friendly and completely safe to use.

- Attractive appearance.
- The presence of a protective non-stick layer that prevents food from sticking and burning during the cooking process.
- Good thermal conductivity characteristics.
- Practical and easy to use, do not require special care.
- Retains heat well.
- High temperature resistance.
- Low cost.
- Safety and environmental friendliness of the material.
- Possibility of observing the cooking process through glass sides.
- When heated, no harmful substances are released.
- Heat retention a long period time.
- Attractive appearance.
- Easy to use and maintain.
- Durability, practicality and safety.
- Resistant to deformation and corrosion.
- Good ability to keep the shape of the finished dish when cooling.
- Resistance to temperature changes.
- Prevents food from burning when cooking.
- Low cost.
Minuses

- Food may burn during cooking. Models with an internal non-stick coating will help get rid of this problem;
- Cannot be used in a microwave oven.
- Large weight of products.
- Unpresentable appearance.

- Susceptibility to mechanical damage.
- Short life and low wear resistance.
- Considerable weight.
- High moisture absorption.
- Susceptibility to mechanical damage, chipping, cracking and the negative effects of abrasive cleaning agents.
- Fragility.
- Susceptibility to open flame. It is not recommended to place such products on an electric or gas burner to avoid damaging the glaze.
- High price.

- Susceptibility to mechanical damage and abrasive detergents.
- Fear of sudden temperature changes. It is not recommended to fill a hot Teflon coating with cold water.
- High price.
- Short-lived.
- Requires additional lubrication.

- They require special care.
- Susceptibility to sudden temperature changes and mechanical damage.
- High price.
- Susceptibility to open fire, piercing objects, abrasive substances.
- Use at temperatures above 240 degrees is not recommended.
- Doesn't hold its shape well when heated.

When choosing baking utensils, you need to consider the following points:
- container shape;
- maximum operating cooking temperature;
- product care requirements.
For original and festive dishes, you should additionally purchase a shaped container.
It is important to pay attention to the maximum operating temperature. Glass and Teflon utensils are used at temperatures up to 200 degrees, metal and ceramic - up to 280, and silicone - up to 230.
- A goose pan is suitable for roasting meat, poultry and fish.
- Vegetables and fruits can be prepared in glass and ceramic containers.
- For pies, casseroles and charlottes, a Teflon and metal base is intended.
- Bakery products bake well in a metal pan.

The best options for daily use are silicone, ceramic, cast iron and metal containers. They are practical, easy to use and maintain, and are suitable for preparing homemade dishes of varying complexity.
Products made from such materials are absolutely safe for humans, do not emit aggressive substances or carcinogens when heated, and do not change the taste characteristics of ready-made dishes.
In terms of design features, solid containers are the most reliable. They are more durable and practical to use compared to products consisting of several removable elements.
How to use baking dishes
Any baking dish is subject to strong heat during use. Therefore it is important to comply simple rules security to avoid possible problems.
- Metal products cannot be used in microwave ovens. To care for stainless steel molds, mild detergents and special sponges are used.
- Aluminum molds are intended for cooking in ovens only. Mild soap solutions or soda are used as care products.
- Teflon with non-stick coating. To care for such containers, mild household chemicals without abrasives are used. It is better to replace hard brushes and metal scrapers with soft, moisture-absorbing sponges.

- Silicone. Before use, such molds should be thoroughly greased with oil. Silicone products are intended for use in ovens and microwaves. They are not suitable for cooking on electric or electric stoves.
To care for silicone, use a neutral detergent or a soap solution applied with a sponge. To avoid damaging the silicone, it is not recommended to cut or pierce baked goods with sharp objects.
- Glass containers are designed for preparing dishes in the oven and microwave, and for storing food in the freezer. Glass does not tolerate sudden temperature changes, so a hot mold can only be rinsed with warm water.
- For care, soap solutions, soft sponges and brushes are used.

- Ceramic. This type of cookware is suitable for cooking in ovens. It is resistant to high temperatures, but sensitive to mechanical damage. Care consists of washing with neutral household chemicals using soft sponges.
- Paper. They are disposable tableware, so they do not require maintenance. Before use, it is recommended to thoroughly lubricate the inner surface with oil. After cooking is completed, the mold is cut and disposed of to remove the finished product.
Bakeware Manufacturers
A Russian plant producing metal utensils of varying complexity and purpose. The company presents reliable high-quality aluminum cookware - frying pans, pots and baking dishes with non-stick ceramic coating.
Pyrex
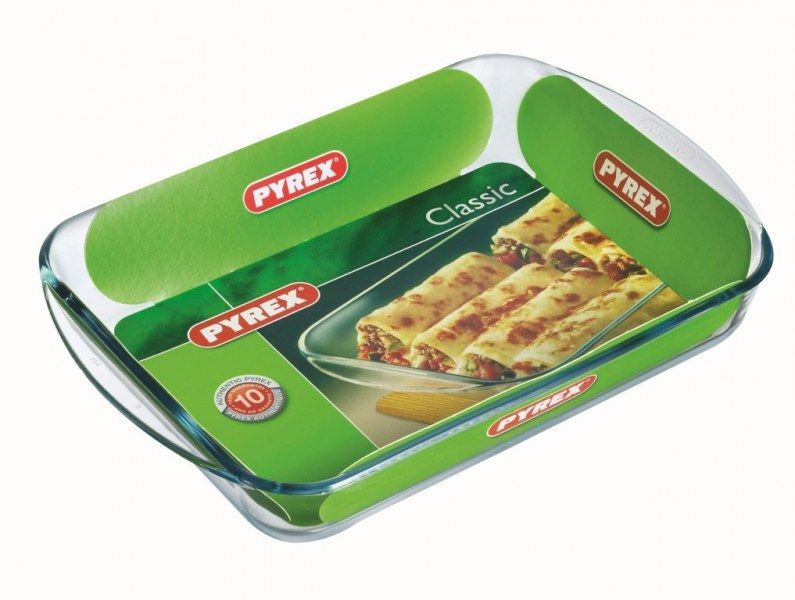
A leading European brand that produces luxury tableware made from heat-resistant glass. The Pyrex brand includes kitchen accessories, cookware made of ceramic, glass, metal and silicone for baking, cooking on the stove and freezing.

A Chinese-Italian brand that represents practical cookware made of stainless steel and heat-resistant glass. The products are hygienic, safe and practical to use.
New to the collection are products with a reliable non-stick ceramic coating that can withstand high temperatures. The product line also includes convenient silicone molds for baking in ovens.

The German manufacturer of modern tableware and kitchen accessories offers stylish collections made from reliable and durable materials.
The company presents utensils for cooking on gas and electric stoves, baking dishes made of wear-resistant carbon steel and silicone of various configurations and sizes.

An international brand that offers modern tableware, products and kitchen accessories made from safe and environmentally friendly materials. The product line includes baking dishes made of silicone and carbon steel with non-stick coating.
Tefal

A European brand that specializes in the production of household appliances and kitchen accessories. The company offers non-stick cookware for cooking on the stove and in the oven.
A special place in the production line is occupied by baking dishes - made of silicone, ceramics, carbon steel with non-stick and ceramic coating.

The trademark belongs to the Bergner company, which specializes in the production of luxury tableware, kitchen accessories, household appliances and household goods. The company presents a range of baking and casserole dishes made of heat-resistant ceramics and carbon steel.


