Date of: 19.05.2016
Subject: Note N79. Review of fine abrasives using the example of sharpening razors
This material is a derivative of those plans and ideas that appeared in the summer of 2015. At that time, there were thoughts that it would be nice, using the example of the domestic Soviet razor and abrasives from the times of the USSR, to try to reproduce what great-grandfathers, grandfathers and, partly, fathers could squeeze out of dangerous razors. Of my ancestors, it is known for certain that only one, my grandfather, used a straight razor until electric razors appeared on the market. I myself remember him only with an “Era” electric razor, which was popular during my childhood and almost everyone around me shaved with such razors.
I won’t reveal anything that hasn’t already been discussed more than once or discussed in various forums. The following is just one experience of a person who became interested in sharpening and sharpening straight razor including. On this personal experience I was convinced of what they were already saying. But there is not always confidence in these words and you want to verify what is said personally. For this reason, there is no expectation that my experience will inspire confidence. Trust still needs to be earned. And, everyone goes their own way. But I hope that this material will help someone save time, effort, nerves and money.
During the year, several new razors from the USSR era were purchased, as well as a certain set of various abrasives, which are positioned as razors.
For example, a razor whetstone made of microcorundum.
Or such a wonderful specimen of Beloretsk quartzite, better known as belorechit.

And also a set of GOI paste. The paste was purchased brand new, but some experienced comrades competently claim that the current GOI paste is no longer the same as it was under the Soviets. I cannot confirm or refute this. But the mentioned pasta will not become the heroine of this story, for certain reasons.
The note was postponed because... At first it turned out that I decided to film it, and the idea of experiencing in my own face everything that my grandfathers experienced somehow faded into the background and was put aside. I didn’t really return to it, but abrasives were purchased, plus an impressive block of Chinese Guangxi stone appeared, on which I laid my hands big hopes.
With this arsenal and a couple of test straight razors, I went to open the 2016 summer season at the very end of April. And based on the test results, it was decided to create a small rating of finishing razor abrasives and record the results obtained.
The first to go was the Soviet touchstone for straightening razors made of microcorundum. After checking it with a metal ruler, I found a small saddle and decided to straighten it. There were no signs. I quickly trimmed it with 220 silicon carbide powder, but as soon as I switched to the 400 fraction, the fun began. Instead of polishing the surface of the whetstone, a thin, loose, spotty film began to form on it, which could be wiped off the stone by rubbing it with your finger. No matter how hard I tried, nothing good came of it. I tried 600 grinding grains of silicon carbide, the result was similar. As a result, I returned to 220 powder, which removed the “scab” perfectly, but the touch felt very rough compared to the second factory side. I tried rubbing it on sandpaper. This is where things got better. I went through 600, 1200, 1500 and then 2000 paper. The result, in general, turned out to be comparable to what was from the manufacturer, but plus or minus. Rather a minus for me. I completed the preparation with this abrasive. This was the first incomprehensible and unsuccessful experience of lapping on silicon carbide. This is what came out as a result from the side I was arguing.
And this is a factory adjustment from the manufacturer.

The instructions for the microcorundum whetstone say that it should be used with soapy water. That's what I did. First I started working on my side, the one that I had previously ground in. I worked for some time on the test razor (and it was decently sharpened and brought to an acceptable shave). I looked at the result and was horrified. The resulting risks were visible to the naked eye. I changed the side of the whetstone to the one that was factory finished. I started working on this side. The situation has improved a little, but only slightly. I concluded for myself that I would have no desire to even try to shave with such a razor. I ran the razor once over the stubble and felt all the harshness and sharpness of the shave. At this point I finished testing with the touchstone. In my rating of finishing abrasives for razors, I will give this touchstone the last fifth place.
The second place was Beloretsk quartzite. Such a beautiful stone, pleasant to the touch, with a Soviet blue seal. I had it for a long time and wanted to try it on a razor. Estimated the size of the stone. When I ordered and bought it, I thought it would be bigger, but it arrived just a baby. But when I put it on my palm and started sharpening the razor, I realized that I liked this shape and size. And it’s not heavy, and the razor glides over the stone very confidently.

I looked differently at this format of stones as applied to a razor, although for a long time I considered the most convenient stones to be wider than the blade of the razor. There is, of course, a point for discussion here, because... If you are working with nagura suspensions, then a wide stone is probably preferable. But at the finishing stages and during straightening, when you work on stone only with water or oil, the width no longer matters so much, but convenience and control over the work become much more important. This was for the health of Belorechit. Now for peace. The marks from my specimen also turned out to be visible without optics, which suggests that the stone is quite rough and is not suitable for the role of finishing stone for razors. There are options to play with finishing the stone using different grinding grains, but I don’t want to spend time on this yet. I put Belorechit in penultimate or fourth place in my ranking.
What conclusions did I draw based on the two previous experiences sharpening? That these abrasives are not enough to keep the razor in good condition. And although the instructions for the microcorundum whetstone say that after it the razor should be finished on a canvas sling, and then on the skin, something tells me that pasted belts should be inserted before them (for example, with GOI paste). This apparently was practiced due to the inaccessibility of finer abrasives. I didn’t do this because... I was no longer interested in such a process and the subsequent result.
A miracle did not happen, but there was still hope that not everything was so bad with domestic fine abrasives. There were also doubts about the idealization of certain abrasives from different parts of the world and thoughts about belittling the capabilities of abrasives mined or produced on the territory of the USSR. They dispersed. There is also baicalite. Recently, cunning businessmen appeared who, under his guise, began to trade something similar. After a small scandal and debate, they began to call it tuffite or baicalite-tuffite or something else. I stopped watching the battles of the businessmen and I don’t know how it all ended. I have something similar in the format for the Apex format sharpening device, but when sharpening knives it did not show anything particularly outstanding.

This stone worked for me when sharpening knives, probably thinner than belorechit or micro-corundum whetstone on razors. I could try this stone on a razor, but not this time. And I didn’t take it with me, and it doesn’t have the same format. I definitely won’t buy it for razors again.
I'll put Black Arkansas in third place.

There are a lot of copies here, and discussions are overflowing. Arkansas are certainly different from each other. I have a freshly mined one from Dan's company. Lapped on silicon carbide powder of the 1000th fraction. I can say that this stone was my first sharpening, after which I was able to shave more or less tolerably. But you can regularly come across opinions that a razor after a black Arkansas blade is quite aggressive. The serration on the edge is bristly, and shaving with such a razor, as they used to say, is “disturbing.” Sharpening techniques on Arkansas blades, and even the stones themselves, may differ. You can also find quite flattering reviews that on Arkansas the razor finishes decently. It is not my task to refute these opinions, but I have given up trying to get the sharpening out of my Arkansas to give a decent shave. I have no desire to look for another Arkansas. For knives, black Arkansas is one of the best finishing stones, for my taste. But for a razor, it’s not for everybody.I put this stone in third place, due to the rather aggressive edge after finishing on it.
Guangxi. The stone is natural and from China. According to reviews, it’s a big lottery to buy a decent copy. Because If the stone is natural, its structure and nature of work may vary from layer to layer. But, it is quite thin. Those inclusions that are found in it, for example, are reddish-brown in color, have a soft structure (according to the descriptions of the rock, these are the fossilized remains of ancient plants) and they do not affect sharpening.

My Guangxi copy is finished with 1000 silicon carbide powder. The stone was larger, but during the leveling process a serious crack was discovered in it and it had to be shortened. Based on my impressions and taking into account my technique for sharpening a razor (with the stone on my hand), even this handheld version is too weighty and inconvenient. The hand gets tired. You need at least half the thickness. It became clear why some sellers cut them down to make them at least twice as thin. I conducted an additional experiment with this stone, refusing to early stages sharpening from synthetic abrasives. Now I'm using a set of solid Norton Washita, finished with 400 KK powder and black Arkansas from this note above. I don’t particularly lick my razor with these two stones, but the results show that it can shave with a squeak. And then I move on to nagura. IN in this case to Guangxi and Nagura. I use nagura attributed to Asano (Asano Nagura).

When you work with nagura, there are no special differences from working with other honzan bases, but they begin to appear when the nagura suspension is diluted during the work process. It feels like the razor is starting to slide over the Guangxi stone like a palm through soap. Perhaps Guangxi could have been handled a little more harshly, but there is no such desire. As a result, the process of sharpening and finishing is somewhat drawn out when compared with Japanese natural stones. This is especially felt at the finishing stage, when you are working on clean stone without using nagura. If the technology of sharpening with nagura is not very clear, it is described in detail in the article using the Iwasaki method. I showed how I do it myself in the film. From my own experience I was convinced that Guangxi is a rather specific and slow stone. But, in the end, the effect of slight sticking/slowing down of the finished razor on the stone is present. In general, this stone is quite suitable as a base for nagura, as well as for finishing sharpening a razor. Overall, Guangxi ranks second.
It is very difficult to decide on the first place. On the one hand, these are hard Japanese natural stones, on the other, Thuringian slate (but soft or hard is the question). Moreover, the fairly cheap Japanese Shobudani stone gives me finishing results comparable to the finish of the attributed Japanese natural stone Nakayama Maruka (also not so expensive). Both are lapped with 1000 silicon carbide powder. There are recommendations to finish grinding such stones not on free grain, but on something made of thin synthetic water stones. I don't have any of these in stock, so I'm content with what I have. Namely, silicon carbide powder. Nakayama Maruka was lapped on thin synthetic by the previous owner. Afterwards I finished it myself on silicon carbide. I didn’t feel any particular difference in the performance of this stone after one and the other type of finishing.
My first Japanese natural stone Shabudani.

And this is Nakayama Kiita Maruka. Once the stone was inserted into the box, but I uprooted it from there, because... I prefer to sharpen the razor while holding the stone in my hands.

Next comes the export Thuringian.

Unfortunately, it is not attributed to the Eschers (J.G. Escher hones). The seller, and the meager descriptions from the Internet, suggest that my stone is from a series and type sold by S.R. Droscher. I had the razors that finished at Escher. And we managed to compare the difference in finishes. If there is a difference between them and my Thuringian stone, then, to my taste and physiognomy, it is very insignificant. The stone is ground in 1000 silicon carbide powder. They recommended grinding it no higher than 600 fractions, but I couldn’t resist and brought it to 1000. So far I’m happy with the result and I don’t want to scratch the stone again.
I still can’t decide which finish I like better, Japanese natural stone or Thuringian. On the latter, you may not be very happy with the fact that the water does not lie on it as a thin film, but collects in puddles during operation. The line in fine-tuning is so small and blurred, and testing conditions vary (the razors are different, the face is prepared differently, the stubble different lengths) and it is still extremely difficult for me to grasp this line. I like both, but I still want to find something even better, even thinner, even more comfortable.
To sum up this personal rating, I can say that if you are interested in budget sharpening and finishing of a razor, then this is a set of Guangxi and Asano Nagura. If you want some sophistication and greater speed of work, then here is a set of Japanese natural stone and Asano Nagura. At the same time, there is little point in chasing attributed stones, which will not provide any special finesse or quality of finish, but will rather have a collection value and interest. Well, to show off, you can add Thuringians to your arsenal and diversify the finish of the razor sharpening. The only drawback of the Thuringians compared to the Guangxi and Japanese naturals is that these stones are finishing stones. Guangxi and Yapnuts in combination with Asano Nagura give a greater range in sharpening and finishing than the naked Thuringian. You can't staff it with nagurami. You can, of course, try with nagura, but your hand doesn’t rise, so you’ll have to select a whole set of stones to squeeze out something similar to what Asano can be given with nagura with a hard base stone (called awasedo or honzan).
The optimal option would probably be Japanese inexpensive natural stone and a set of Asano Nagura. The rest is subtleties and delights that only people who are keen on sharpening and close shaving can appreciate.
But there are still enough stones for sharpening and finishing razors. Perhaps, if I have the means and desire, I will try other options and add to this note.
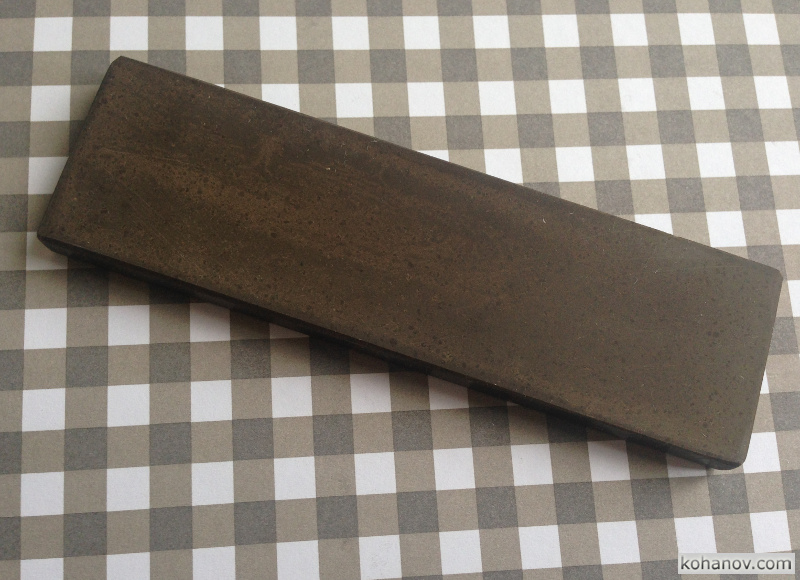
I have a Soviet block for finishing straight razors. As I found out later, it is made of black slate. It works quite subtly. The Chinese stone turned out to be somewhat rougher, but quite suitable for working with knives.
With its help, a slightly dull blade can be made razor sharp again.
I’ll start right away with the fact that next will be the bare P.18.
I saw two natural stones in the store, 5000 and 10000 grit. I became curious, asked, and they sent it. If I bought it with my own money, perhaps I wouldn’t be so decisive and brave :) I didn’t even know that I would get slate. The description says rather vaguely - Natural pulp stone.
Now, I’ll finish making excuses and start the actual review.
The package with two stones was very heavy, approximately 2 kg.
A bubble bag containing two cardboard boxes wrapped in polyethylene foam.
The boxes differ only in the barcode stickers. 
Inside, the block was placed in another bubble bag and protected at the top and bottom with rubber backing. Good for transportation, but bad for preserving the rubber stands. They stretched, tore and, as a result, did not hold on to the bare stone at all. 
This is what the block looks like in working position on one stand.
The length of the bar itself is 178 mm, width 58.5 mm, height 30.8 mm. 
Let's look at the front side of the stone. 
I'm glad that there are no obvious marks from sawing. 
But the presence of brown inclusions in the structure of the stone could theoretically be a problem. 
The corners of the stone are straight; if desired, you can later remove the chamfers. 
Now let's look at the other side. 
The surface is also more or less flat. But along the entire stone there are three suspicious light stripes. 


Now let's look at the side surface. Small traces of sawing the stone are visible. 
You can see that the layer with inclusions is superficial and does not go far. 
There are no inclusions in the middle at all. 
But at the other end of the stone a large vein is visible. 
On old black slate, I tried to finish the blades both with water and “dry”. I also tried working on a new stone without water. That's why it has minor scratches. 
The photo clearly shows the difference in colors between black and gray slates. 

I used to smooth black slate using wet sandpaper, it turned out well and quickly.
I decided that it would be possible to match gray on frosted glass.
I applied a pencil grid. 
He moistened the stone and began to write “eights” on the frosted mirror. Pretty soon a suspension appeared. 
As the grid disappears, progress towards a flat surface can be observed. 
But the progress turned out to be too long. I dragged the stone across the glass for more than three hours, and I didn’t get any further than this. 
The stone was noticeably “sucked” to the glass, and considerable effort had to be made to move it. As a result, after an hour of work I received an unpleasant surprise. The corner of the stone has broken off. 
Then it dawned on me that the light stripes on the surface were cracks. Look at the photo above, where I wrote about veins. There you can already observe the future fracture site. Water was easily absorbed through the cracks, perhaps this also had an effect.
I hope the broken corner can be glued back. I don't know which glue is best to use for this. Hansa recommends epoxy with filler.
To quickly finish the leveling job, I decided to buy a large piece of waterproof sandpaper. An ordinary Belgorod “nolevka” would suit me. But to my great bewilderment, such a basic thing was not found in nearby hardware stores.
Okay, I have some supplies. I dug around and found a Mako sheet. 
This is where things got much more fun. 5 minutes have passed, and all the juice is already in suspension. 
Ready. 
Cracks are clearly visible on wet stone. You can also consider golden inclusions. 
At the same time I photographed the other side of the wet one. Due to a chip, the former front side became the reverse side. 
The stone moved a little more on the frosted glass and this is what happened. 
It can be seen that there were small scratches left, in a good way, it was necessary to work with finer sandpaper.  Cracks are visible on the end. I really hope that my stone will not split into two halves.
In the middle the surface turned out to be quite smooth. 
Let's move on to testing.
I've always thought of slates as finishing stones that create a mirror-like shine. But before the review I found out that this is far from true. Even Soviet industry produced whetstones for straightening straight razors, as well as separately coarser slate whetstones for finishing the cutting edge of tools.
Some good advice on working with slates, I got it from here
When working on shale, the main conditions for a good result are:
1) before finishing on slate, the knife should already be well sharpened and slightly finely polished on a not too coarse grain, about 3000 grit. The burr from the previous grain must be removed. Slate only works well for finishing.
2) the surface of the slate must first be brought to the minimum roughness that can be obtained, it can be brought. But as a rule, these bars are finished and ready for work.
3) when finishing an edge on slate, the pressure should be minimal. Under no circumstances should the knife scratch the surface of the slate, and if this does happen, then reduce the pressure until barely noticeable shiny traces of metal remain on the surface of the slate, and the surface itself remains completely smooth.
4) it is imperative to moisten the surface of the stone with clean or slightly soapy water.
5) before starting work, it will be useful to lightly apply the suspension by rubbing the surface of the stone with another piece of the same slate, it’s not only a matter of the suspension, but also the grinding, this improves the finishing properties of the stone surface
First, let's try to evaluate the purity of the stone. I’ll say right away that without much experience and the presence of a microscope, everything turns out very amateurishly. But I try my best.
After testing previous abrasives, I have a cutter made from an old needle file, polished to a mirror finish. 
However, upon closer examination, numerous longitudinal and transverse scratches were revealed. 
We wet the slate with water and try to work a little. 
To make the risks visible, I made diagonal movements.
As a result, the risks are uniform, but the metal surface is far from mirror-like. Some more white spots appeared. The stone is clearly not suitable for surface finishing. 
Let's compare it with Soviet black slate. 
I also worked diagonally, but at an angle of 90 degrees to the previous risks.
The metal began to mirror. The surface is noticeably cleaner. 
Let's move on to practical testing.
Y-Start Jin02 is a little dull, does not shave his forearm, and cuts newspaper with uncertainty. 
Let's get to work. 
If you sharpen “dry”, the blade removes the gray powdery mass from the stone. 
But I worked as recommended, with water.
A rich suspension quickly appeared. 
Literally 10 minutes and the knife shaves provocatively.
Be careful with your hair!

And he cuts the newspaper on the fly.

The risks from factory sharpening have not gone away. The leads have been sanded a little at the edges.


I tried to sharpen a knife with VG-10 steel that had become thoroughly dull after the rope test.

But it was not possible to get further than cutting office paper.

Let's sum it up result.
Although the stone is a bit rough for slate, it works quite well. It is quite possible to sharpen knives on it. It probably won't work with straight razors.
Colored inclusions were not felt at all when working on the stone. I don't think they interfere.
It was extremely unpleasant to discover the presence of cracks and that the stone had split. It's hard to say whether the cracks were on the stone right away or appeared during delivery. But I can say that susceptibility to chipping is a common problem with slate stones.
If the review is read by specialists with extensive experience, I hope they will help determine whether the stone is similar to guanxi. Some photos show very similar specimens.
That's all.
Thank you for your attention.
The product was provided for writing a review by the store. The review was published in accordance with clause 18 of the Site Rules.
I'm planning to buy +9 Add to favorites I liked the review +52 +72It must be admitted that I decided to write this article not without hesitation. Their reason is ridiculously simple, and it is this: “As many sharpeners, as many sharpening methods.” It is clear that sharpening a knife is different from sharpening scissors, and both are different from sharpening a bladed razor. Actually, the latter is the subject of my next note, which should be taken as an invitation to discussion. But the discussion is constructive, where there is no place for trolling and arguing until we are hoarse about which of us, the “grinders,” is cooler.
The issue of sharpening razors is not at all easy, and it needs to be approached carefully and carefully. At the same time, I don’t like to cast a shadow on the fence and believe that the problem of sharpening is so important and eternally relevant that it would be wrong to ignore it in the blog. I will try to present the material in such a way that it is understandable to the reader who does not have professional training as a sharpener and is generally encountering such a discussion for the first time. Additional motivation for writing this article came from questions from our customers who note the high quality of the razors. « Art RAZOR» and, at the same time, sometimes they show surprise at our choice of sharpening materials. In fact, many European razor lovers are still confident that the best sharpening of a blade can be achieved exclusively with expensive natural stones!
Razor model " RAVEN" (production " Art RAZOR") on the working surface of the synthetic stone series NANIWA SS(800 grit)
There is one more point. Many users of blade razors have become adept at sharpening their tools on their own, and some even enjoy this process, simultaneously deriving purely practical benefits, i.e. do without paid professional sharpeners. However, in any case, in order to do this work, you need quality stones. Well, and skillful hands, of course :). And if the first is relatively easy to solve with the help of money (usually considerable), then the second is a matter of rather sophisticated skill and motor skills. I think I will also touch on “amateur” problems, but now I want to focus on professional sharpening.
What is it? What are the criteria for professional sharpening? Personally, I distinguish three of them for myself:
The ability to get a high-quality shave right out of the box, without any adjustments or additional tricks;
Stability of sharpening, that is, the razor retains its excellent shaving properties for a long time (at least six months to a year), subject to proper daily use and competent editing by the user himself;
Comfort, “softness” of shaving, when no special effort is required during the procedure.
The listed points can be put in any order, the essence will not change. In fact, it is precisely on these tasks that any sharpener concentrates. But the result is achieved in different ways. Unfortunately, due to the involvement of a fairly wide range of people of varying degrees of training in the discussion, the problem has acquired a large number of myths, prejudices and even outright “sectarianism”; Sometimes these controversial and false stereotypes penetrate into the professional environment.

The main question that causes a conflict of opinions is whether to sharpen with natural stones or synthetics? Let's look at this in more detail. And for this we will make a very small theoretical excursion.

My working set of Japanese synthetic water stones of the professional NANIWA SS series, by grit from left to right: S 400, S 800, S 3000, S 10,000. There is another “step” missing in the picture, 6000 grit, since I use a stone from a different line; This is how it happened historically :)
Sharpening is the formation of the working surface of a cutting tool. In the vast majority of cases, and always in relation to a razor, sharpening is performed mechanically, by removing “extra” metal in the area of the cutting/shaving edge. Sharpeners of blade razors one way or another strive for the so-called fast sharpening. It means that when working on each abrasive material, we get a gain in sharpness, and so we move from coarser-grained abrasives to less coarse-grained ones. Since correct sharpening of both the razor and the knife is carried out exclusively across the cutting edge, a microsaw is formed, which is responsible for the cut. Let me note in passing that significantly higher requirements are placed on the razor’s microsaw, since the hair is cut in one movement, sliding at a certain angle to the surface of the skin (about 15-20° degrees, contrary to the common misconception about 30° due to inattentive reading of specialized hairdressing literature) and at a certain angle (about 25-30° degrees) to the general direction of shaving the area. If this second angle is ignored, then shaving occurs not by cutting, but essentially by scraping; then they talk about straight shaving, which is not very welcome, as it injures the skin and does not use the full potential of the tool.
When the correct geometry of the edge is set already at the very first stages, then in fact, then the sharpener only removes the risks remaining from the previous coarse abrasive, and even more precisely, covers them with new ones, which are much finer. The smaller the marks, the sharper the razor. In theory, everything is extremely simple :).
Almost everyone who sharpens razors is unanimous in the opinion that the following stages should be followed: 1000 grit (sometimes you can skip), 3000 grit, 5000-6000 grit (depending on the composition of the kit from a particular manufacturer), 8000 grit, 10,000 grit, and... further, as they say, to taste; some go further, up to 15,000 and even 18,000 grit, which I personally think is excessive. (In passing, let me note for the uninitiated, to simplify it greatly, that grits are a unit of measurement for abrasive materials that shows how many uniformly distributed and almost identical particles of abrasive fit on a square centimeter of a tool - stones, circles, sandpaper, etc.) Alas, this is the same Grit is not very standardized today, and therefore there are even some comparative tables that bring grits into line with the microns in which roughness is usually measured (a fairly good, albeit cursory, overview of the issue can be found, for example, here:
Roughly speaking, leading manufacturers of sharpening stones are tied to their own internal industrial standards, and they correlate non-linearly with each other. With synthetic stones everything is somewhat simpler and more standardized, although there are certain differences depending on the manufacturer.
As I have already said, many sharpeners of blade razors believe that “real” sharpening must certainly be done on “naturals”, or natural sharpening materials - Japanese hard water stones using the so-called nagura (providing a fine suspension with water; it is the nagurami that sets the sequence of increasing grit), various American “Arkansas”, European or Chinese slates, etc. And there are also stones that are sharpened using oil. Generally speaking, full list of all kinds of stones would make up a rather impressive catalog. Sometimes Japanese stones are simply elevated to cult; their supporters create a whole philosophy around the subject and, in general, as they say, catch Zen. To be fair, it should be noted that before the advent of high-quality synthetic stones, yapnuts gave very good and, as a rule, predictable results... I think sharpening on natural stones has become widespread and highly appreciated due to the fact that many advanced users periodically do not sharpen, but simply sharpen their razors, and this has become a good habit for them at the level of a reflex. In this case, naturalists are a completely acceptable option.
At the other pole are those who generally prefer to form the cutting (shaving) edge of the razor on sandpaper, and then bring the razor’s sharpness to a comfortable state on a pasted belt - leather or fabric, lubricated or rubbed with abrasive paste, in the simplest case GOI paste. I don’t want to dwell on this method in too much detail, because I consider this approach to be amateurish and lead to rapid wear of the razor itself and inevitable distortion of its original geometry. However, for a not-too-demanding user, this is almost the only way to keep the razor in working condition without incurring special costs, without delving into the intricacies of our craft and without the services of a professional. After all, this is how our grandfathers sharpened their razors :).

An example of a razor that has been sharpened correctly, and therefore its original geometry is preserved in excellent condition, despite its very “venerable” age (razor ERIK ANTON BERG, Sweden, Eskilstuna, con. XIX century - beginning XX century

This razor was not so lucky (razor BENGALL, England, Sheffield). In this case, I do not mean damage to the handle, but defects in the blade, which are a direct consequence of systematic unprofessional sharpening, most likely using emery and a pasted belt: sharpening of the blade, significant grinding of the spine and a clear tendency to the so-called. a reverse smile - the bend of the line of the shaving edge towards the butt... But this razor, initially excellent - is almost the same age as the previous one!
What about the notorious mirror-like edge shine? The play of light on the edge is a spectacular thing. Of course, such an effect in combination with a successful hair cutting test, as a rule, indicates a high-quality, solid sharpening. At the same time, the “mirror” is not an end in itself. But the width of the edge is directly related to the ergonomics of use. A tool with a thread edge is easier and faster to sharpen on a clean belt; this sharpening promises to be more durable. But this is just a natural consequence right actions qualified sharpener. The main argument in favor of synthetic stones - an argument that reflects the physical essence - is that at each stage of grit, up to the highest values, it is sharpening that occurs, and not polishing and smoothing. After all, at each stage metal is removed, that is, the edge in the transverse projection becomes sharper. Metal removal provides specularity, because the fresh regular marks left by the abrasive on the steel are very small; With high grit it is not so easy to see them even with a magnifying glass; you need a good microscope.

Shaving edge of the razor " ERIKA" ((production " Art RAZOR") demonstrates our internal sharpening standard.
What happens when using natural stones as the number of grits increases? Up to a certain value of grit (this line, in my experience, lies somewhere around 3000-6000, depending on the brand and quality of the stones), the difference between natural and synthetic is almost invisible, insignificant. There is intensive metal removal (at the micro level, however, synthetic stone still gives a more regular picture), the shaving edge is formed in the “standard” mode. But at a certain stage, natural stone begins to work simply as a flat table with a certain average roughness coefficient, and the soft nagura suspension has practically no abrasive properties in relation to steel. It, of course, is needed for something else, for sliding and protection from peculiar microtraumas of the edge, because the movements of even a very good sharpener are imperfect. So, the metal is no longer removed, and the shaving edge begins to simply to be smoothed, to be more or less well polished. At the same time, the sharpness of the blade also increases, but this is no longer a completely controlled and manageable process, which is closer to art than to technology. With all the ensuing consequences. What happens during burnishing is a microscopic analogue of “hardening”, when the geometry of the cutting edge is adjusted using pressure applied perpendicular to the plane being leveled. This is how a regular scythe is prepared for work; An experienced mower can easily improve the cut of his tool by beating the edge with a hammer on an anvil. As we can see, the physics of the process when working at high grit levels differs significantly between natural and synthetic materials. With micro-hardening it is much more difficult to achieve a mirror-like shine on the edge. However, some sharpeners succeed in this.
In general, today I do not know a fully developed and exhaustive model of the razor sharpening process in the smallest details. The expressed considerations and deep theoretical knowledge of anyone, in fact, are worth nothing without skillful and experienced hands. Sharpening a razor is one of those activities in which a combination of understanding is best demonstrated. theoretical foundations and development of sustainable practical skills. Here practice and the quality of the result act as the measure of things. And of course, each master has his own style, set of techniques and professional “secrets” that cannot be conveyed in simple small talk.
I really don't want to seem categorical. Inevitably, my reasoning will seem controversial to some, this is completely natural. I don't consider myself an infallible guru of the razor sharpening process. But everything I write about here are conclusions drawn based on my own experience, both positive and negative. In addition, almost any user who has purchased our razor can testify to the high quality of sharpening and shaving comfort. And therefore I will allow myself to draw several conclusions, which I formulated primarily for myself and for Club of Free Masters « Art RAZOR» .
Conclusion one:if you need the most predictable result, then it is easier to achieve it using synthetics, especially if you do not have a long-term habit of using natural stones.
Conclusion two:When sharpening a razor, you need to care not only about the immediate suitability of the tool, but also about the duration of the achieved result and the safety of the blade.
Conclusion three (main): You can sharpen in any way and on any stones, if you know how to do it really well! If not, then it is better to turn to a professional and purchase a known high-quality razor, which initially brings a minimum of hassle, worry and work to bring it to perfection.
I responsibly declare that razors « Art RAZOR» You can shave straight out of the box. By the way, developing the necessary sharpening skills for everyone inevitably leads to damage to at least one or two razors. This is the harsh truth, it's a journey of trial and error :).In conclusion, so as not to be considered a boring theorist, I will show how I sharpen myself. This is just a fragment of the video, it does not reflect the entire process, but it shows the nature and intensity of the movements at the final stages of sharpening.
I wish everyone, both professionals and amateur enthusiasts, success in sharpening and am ready, to the best of my ability and knowledge, to continue the conversation about the technology of the razor sharpening process.
Sharpening stones are used with grits of 320, 600, 1500, but sharpening does not reach razor sharpness.
Judging by the 1500 grit stone and the absence of a sharp edge, I assume that this is either a matter of too much pressure on the stone or that the grits are Chinese.
If you have Chinese stones ADAEE or similar, then they should be compared to sandpaper.
Those. The grain size for 320 is M45, 600 is M25, 1500 is M13.
As practice shows, shaving starts from M10-M7 on a hard ligament and M7-M5 on a medium one. Of course, there are talents who can force the M14 to work, but that’s what they are talents for. This is about synthetics.
Tell me, what influences sharpening to razor sharpness the most, what is the most important thing in this matter?
Pressure, pressure and more pressure. Even the thinnest abrasive can bend the edge.
Therefore, the first thing we learn is not to squeeze and remove the burr. Second, turn over what you are sharpening more often; it’s not for nothing that our sharpening heroes spent so much time on turning mechanisms. Well, the third is the selection of abrasive. If the blade does not shave on JiS200 - P3000 - F800, adjust the pressure. And of course all your stones must be aligned.
Is it worth buying a fine-grained stone, such as ACE 3000?
As far as I understand, we are talking about Chinese “ruby” ceramics? If yes, then it’s worth it, there’s no doubt about it. It is sintered aluminum oxide. The abrasive is very cheap if you search for it on Ali or Ebay using the words "3000 ruby Sharpening" ", then it will cost up to 200 rubles with delivery, be sure to check the dimensions so that they are 150*20*5. The whole problem will be to grind it in; the bars most often come crooked. I spent three days on my first one, although I polished it on simple river sand. Apply the grid with a marker; a pencil will not help here. After drawing out the plane, it should be finished using KK F600 powder. As a result, you will get a bar that is enough for you and your children, its production is minimal, and it chews steel well. It’s hard to call it a finish, more like a pre-finish. However, I finish the 50-55hrc kitchen on it, but to be precise, on the second one, which is ground in F1200 powder. Work with it using Vaseline oil from a pharmacy, or better yet, olive oil.
Pasta is a personal choice. I won’t impose it, but if GOI is needed, it’s only for razors; it rips out pieces from stainless steel and polishes out flaws. Chromium oxide causes the metal to “flow”, as does jasper and baicalite, and on free grain this is not always good. If you want a paste, then try aluminum or iron oxide on a hard lap (on the same “ruby” ceramics). When your hand learns to regulate the pressure, you can use leather or a sling, but it’s better not to abuse it.
“It became obvious that for many people there is too much information there. And although the table of the grain size of sharpening stones (gritness of abrasives) given in it will probably be useful to everyone, listing the basic concepts used in sharpening knives, the properties of abrasives and other details is often unnecessary. Perhaps , having read such a comprehensive article, not everyone will find the answer to a simple question: what grit is needed to sharpen his knife? Therefore, I will try to briefly answer what kind of grit sharpening stones are needed for sharpening a knife, in particular a kitchen knife, and how to choose the right stones for sharpening.
Type of abrasive grain in the whetstone
Due to the different properties of abrasives, it is important to choose the right type of abrasive for comfortable and quick sharpening. Diamond or cubic boron nitride (CBN) effectively cuts metal of any hardness. They even cut the zirconium dioxide from which they are made Ceramic knives. Therefore, diamond and CBN stones can be used to sharpen knives of any type, as well as cutters of metal-cutting machines and pobedite drills. Obviously, such sharpening stones must be available, at least for some specific purposes (a drill is dull, it’s faster to sharpen it than to go to the store for a new one). However, due to the excessive sharpness of diamond, the cutting edge formed by a diamond bar will have a distinct notch, reducing its strength. Accordingly, a knife sharpened with diamonds will dull faster than the same knife sharpened to the same sharpness with a less aggressive abrasive. Therefore, if you have to sharpen not only ceramic knives and knives made of powder steels, it is better to sharpen with something else.
The most versatile type of abrasive is silicon carbide. It copes well with hard steels and does not become dull, gradually chipping with sharp edges. The cheapest type of abrasive is aluminum oxide (corundum), but as it wears it rounds and loses its sharpness.
In order to sharpen with cheap abrasives without losing speed, the Japanese make stones from aluminum oxide on a soft, weak bond. The abrasive grains are weakly retained in them and quickly fall out without having time to become dull. Instead of worn-out grains, new ones quickly come into play, the stone is renewed without losing efficiency...
But also quickly wearing down
As a result, despite the cheapness of the abrasive, sharpening on soft aluminum oxide stones can be a more expensive pleasure than sharpening on silicon carbide stones.
However, if you only have to sharpen stainless kitchen knives (which have a relatively low hardness), you can reduce the cost of the process by using not too soft aluminum oxide sharpening stones, for example, Russian ones with hardness C, or European ones with hardness M (English).
Selecting the hardness of the whetstone
Since when sharpening a knife, the abrasive stone (block) is also ground down, for comfortable and quick sharpening it is important to choose the correct hardness whetstone. Soft stones work faster, but also wear out quickly. The higher the hardness of the knife being sharpened and the wider the sharpening chamfer, the greater the need for rapid renewal of the stone. Classic Japanese knives are made with a single-sided sharpening and a wide bevel made of very hard steel. Soft Japanese sharpening stones are designed specifically for sharpening them. For softer European-style knives (particularly the cheaper Tramontina series), sharpening stones with a harder bond are better suited. With the same efficiency on these knives, they will wear out less. For European knives made of hard steels, which are not inferior in hardness to Japanese ones, but have a narrow chamfer, an average hardness of the binder is needed.
Choosing the hardness of a sharpening stone is often problematic due to the fact that the manufacturer does not indicate it. In this case, you either have to look for reviews from those who have experience using specific sharpening stones (and hope that these people are competent in this matter), or select the right stone by trial and error.
Selecting a whetstone based on the type of coolant
In addition to the hardness of the bond and the type of abrasive, you need to choose the right sharpening stone according to the type of lubricating fluid (coolant). Water stones work faster due to the released suspension (a suspension of water and colored abrasive). However, quickly rusting knives, when using such stones, can become covered with rust right during the sharpening process. Oil stones do not create this problem. But they work slower (often the same stone can be used either with water or with oil, but usually, if the stone is started to be used with oil, it will no longer work with water, like a real water maker). Oil stones are more versatile. If they are also hard like aluminum ceramics, they are very good for processing stainless steel knives (aluminum ceramics are most effective for sharpening stainless knives). Due to the versatility of oil stones, it may make sense to sacrifice sharpening speed in favor of versatility and reducing the number of stones (having oil stones, you don’t have to buy a set of fast water sharpeners for sharpening stainless steel, using the same set for all knives).
Choosing the grit of a whetstone for sharpening a knife
In general, for kitchen knives it is enough to finish sharpening on stones with a grain size of 10 microns (1500 grit according to the Japanese system, 600 grit according to FEPA-F). Although classic Japanese knives, which have very small sharpening angles and are made of brittle steel, and therefore prone to chipping, are best adjusted to 3000 grit (5 microns, F1000). If you sharpen a Japanese knife more roughly, the relatively large teeth on the cutting edge resulting from sharpening will cling more strongly, cut more aggressively, but also break off faster, dulling the knife.
For soft European knives, on the contrary, sharpening up to 3000 grit will be unnecessary, since the edge becomes very thin and on soft steel it quickly wraps like foil and is smoothed. Larger teeth are more durable. However, too large ones will not give the desired spiciness. We need to find a middle ground. Practice has shown that exactly 1500 grit is good result. The knife begins to cut tomatoes at any angle, even tangentially. So, he doesn’t have any problems with any products.
Having figured out what grit you should finish sharpening your kitchen knife with, it’s time to figure out what grit you should start with.
Some people recommend starting with the coarsest stones. There are many instructions on the Internet that state that you need to start sharpening with a stone of 120 grit, or something like that, and gradually move on to finer-grained stones. However, this method is good not so much for sharpening as for destroying the knife. The coarse grain removes metal fairly quickly. This is good if the knife is so damaged that it needs to be repaired. However, just because it doesn't cut office paper well (the paper cut test is often used to test sharpness), that doesn't mean it needs a rough grind. If the knife has already been sharpened once and has no damage, there is no need to sharpen it with a stone coarser than 240 grit (Russian M63, FEPA-F230), unless you want to soon have only the handle left of the knife. Moreover, even 240 grit is often too rough. Good kitchen knives have a fine blade (the thickness of the blade before the sharpening chamfer begins), on the order of half a millimeter. In order to return them to the desired sharpness, it may be enough to immediately start with a 1500 grit stone.
I specially made a video on this topic, using a knife and a stone, the characteristics of which are publicly available and known to many.
For classic Japanese knives with their small angles and brittle steel, the Japanese themselves recommend starting sharpening with 400 grit (Russian M40, FEPA-F320) to avoid chipping. But, since the Japanese do not wait until the knife becomes extremely dull, they usually start sharpening with 1000 grit (grit approximately between Russian M20 and M14, FEPA-F 400-500).
In general, what grit stone to start sharpening with is an individual question. This depends not only on the degree of bluntness, but also on the width of the chamfer and the brittleness of the steel. The larger the chamfer and the stronger the bluntness, the coarser the starting stone should be to reduce time costs. The more fragile the knife, the “thinner” the starting stone should be to avoid chipping.
As a result, it turns out that to sharpen a European kitchen knife you need stones of 240, 400, 800, 1500 grit. For classic Japanese you need 400, 800, 1500, 3000 grit. The Japanese themselves often use a reduced set, reduced by 1 stone: 400, 1000, 3000. As a result, less space is needed for the stones, the whole set is somewhat cheaper, but sharpening takes a little more time. For a Japanese knife of the European type, produced specifically for Europe, depending on the specific models, the best option may be either a set of 240-1500 grit or a set of 400-3000 grit. In many cases, a set of 240, 400, 800, 1500, 3000 grit is good for them.
From my statements about the sufficiency of 1500 or 3000 grit, it becomes unclear for what purpose finer-grained stones are produced. Some “Internet teachers,” apparently believing that since stones exist, they must be used, insist that a kitchen knife needs to be sharpened down to 30,000 grit stones.
But let's figure it out, do you need it, even if the companies that produce these stones claim that you don't need it? The Suehiro company, which produces stones of 30,000 grit, claims that higher than 1500 is not required for a kitchen knife. Hoji Hattori, president of the Masahiro company, in this video, referring to classic Japanese knives, says that sharpening above 3000 grit is not required for them either.
Of course, for microsurgery, where ciliates have to be dissected, stones of 30,000 can be useful. 15,000 grit stones can be useful for sharpening razors. But on a knife, chisel or plane, no one will notice the difference between 15,000 and 8,000 (2 times less grain). There are, of course, people who claim that they notice the difference between 8,000 and 15,000. But I think this is the result of self-hypnosis (if not deception). Because in theory there should be a difference, they want to believe that they feel it.
The 8000 grit stone gives a nice clean mirror. Such a stone is needed either for decorative purposes, or to give maximum sharpness to high-hardness tools that work on hard materials (for example, chisels). No person will notice the difference between 3000 grit and 8000 grit for any product. Accordingly, kitchen knives do not require stones with a grit value higher than 3000. However, if the knife is hard, you can add a small amount of sharpness to it by sharpening it on a stone of 5000 - 6000 grit. It’s possible even 8,000 - 10,000. But this is not so much for sharpness, but for a decorative effect. After 8,000 or 10,000 grit, cutting efficiency may decrease due to the smoothing of the teeth on the cutting edge. Some people, in order to get a mirror chamfer, but not lose cutting efficiency, after sharpening at 8000, sharpen the stone with 5000 or 3000 grit, slightly increasing the sharpening angle. Thus, the main part of the chamfer on the knife remains mirror-like, and aggressive teeth appear at the very edge. All this “dancing with tambourines” naturally takes a lot of time. And, in addition, a lot of money, because the higher the grain size of the stone, the more expensive it is (more overhead costs for crushing, sifting, preventing clumping, obtaining uniformity, etc.).
And now it’s worth asking yourself the question, are sharpening stones with a grit above 3000 necessary?
If you sharpen just to cut, you don't need such stones. If you enjoy the process, you don't mind the money, and you sometimes have time to meditate on the sharpening process - why not? It is healthier for your health to spend $400 on a 30,000 grit sharpening stone than to drink it.
But before you think about buying expensive fine-grained stones, get a basic set from 240 to 3000 grit (possibly 120 grit in case of a damaged knife). Over time, it will become clear to you whether you are ready to spend time on finer sharpening, or whether there is not enough time even for the set that is already in stock.
Abrasive pastes for sharpening knives
Abrasive pastes on leather, felt and other materials are not needed to sharpen a knife. The purpose of the pastes is to polish the surface. They don't add any spice. Often they even lick the teeth, making the knife duller. With careful control, paste on hard, smooth leather can compensate for the lack of fine-grained stone (around 8000 grit). But this replacement will not be effective and is justified only if it is impossible to purchase it. If there is a stone, the paste is not needed for sharpening at all. For surface polishing only.
Sometimes on the Internet you can find videos in which people quickly sharpen knives on leather with paste and, thereby, return their sharpness. But this sharpness is fleeting, as it appears mainly due to pulling out the burr. As soon as the hangnail is crushed (and this happens very quickly), it disappears. This means there is no point in sharpening with paste.
You can often see people straightening razors on their skin...
But, firstly, they edit the skin without paste, and secondly, a razor is not a knife. It is important for a razor to not have teeth so that it does not cause irritation. And editing the skin just smoothes out the teeth and removes any remaining burr, making the razor less aggressive. At the same time, they “pull back” the razor with the skin, just as they “pull back” the braid with a hammer. But for a knife, loss of aggressiveness is not necessary, just as drawing is not needed, since the drawn edge becomes thin, like foil, and quickly wrinkles, dulling the knife.
You can polish the knife with paste after sharpening. But it will cut worse than before the paste. You can remove the burr on the skin after fine-grained stones. But on the skin without paste, and with just a few movements, so as not to overdo it and start pulling out the metal. But just for sharpening, paste is not needed. Just to add more shine.
What specific sharpening stones are best to choose for sharpening?
There is no definite answer here, since it depends on what knives you sharpen. If it's inexpensive, you can look for Russian bars made of aluminum oxide, or even better, silicon carbide (more universal), 120-3000 grit. Then you can compare with the price of Chinese bars Taidea and YJSHARP on Aliexpress. I have not used the mentioned Chinese sharpening stones, but I have seen many positive reviews about them. Judging by the reviews, Chinese corundum bars are less salted than Russian corundum bars. Above 3000 grit you can take Taidea or YJSHARP, but personally I prefer natural stones. I don't like to soak a bunch of rocks, and natural rocks generally don't require pre-soaking.
Inexpensive natural stones can be purchased on Aliexpress.
If price doesn't matter, you can just take the Naniwa SuperStone kit and not have to wonder what it costs.
To regularly maintain working sharpness, you need a stone of approximately 1500-3000 grit. It must work without soaking in order for it to be as convenient to use as a musat. Spyderco Fine (diamond powder, boron carbide, aluminum oxide or, in extreme cases, silicon carbide, it needs to knock down the gloss from the grinder), White Hard Arkansas (lapped to about 1500 grit), Chinese “Red Ruby” and Chinese slates for 2000-3000 grit.
Trying to replace the whetstone with musat will not give long-term results. After several adjustments with musat, the knife will still have to be sharpened normally, starting with relatively coarse stones. And when using a sharpening stone of 1500-3000 grit, the chamfer is completely worked out, and coarser sharpening is not required.
< Правильная заточка ножей Какая зернистость нужна для заточки ножа?


